Coding agents are good at writing code, but not at knowing what your business needs. Qlerify fills that gap.
You model the process with the people who understand it, validate the model, push it to your repository as a specification file, and let your coding agent build from it. The model lives in version control next to the code, so every later change starts from the same source of truth.
The specification is a machine-readable JSON file, not a picture of a diagram. It covers every bounded context in the workflow and marks the one you push from as the current context. For each context it describes:
That is enough for an agent to derive a database schema, an API surface, handler logic that enforces the invariants, and test coverage for all acceptance criteria.
You need:
Open the Domain Model tab, pick a bounded context, and switch to Push Spec.
Validate Domain Model checks the whole context and groups its findings into Major Issues, Minor Issues and Notices. Click an issue to go to the element that caused it.
Fix the major issues first. They lead to broken code: two domain events with the same name, a command with no parameters, a command field that points to a different entity than the entity field it maps to, or a read model that references an entity that does not exist. Minor issues and notices are worth reading but do not block you.
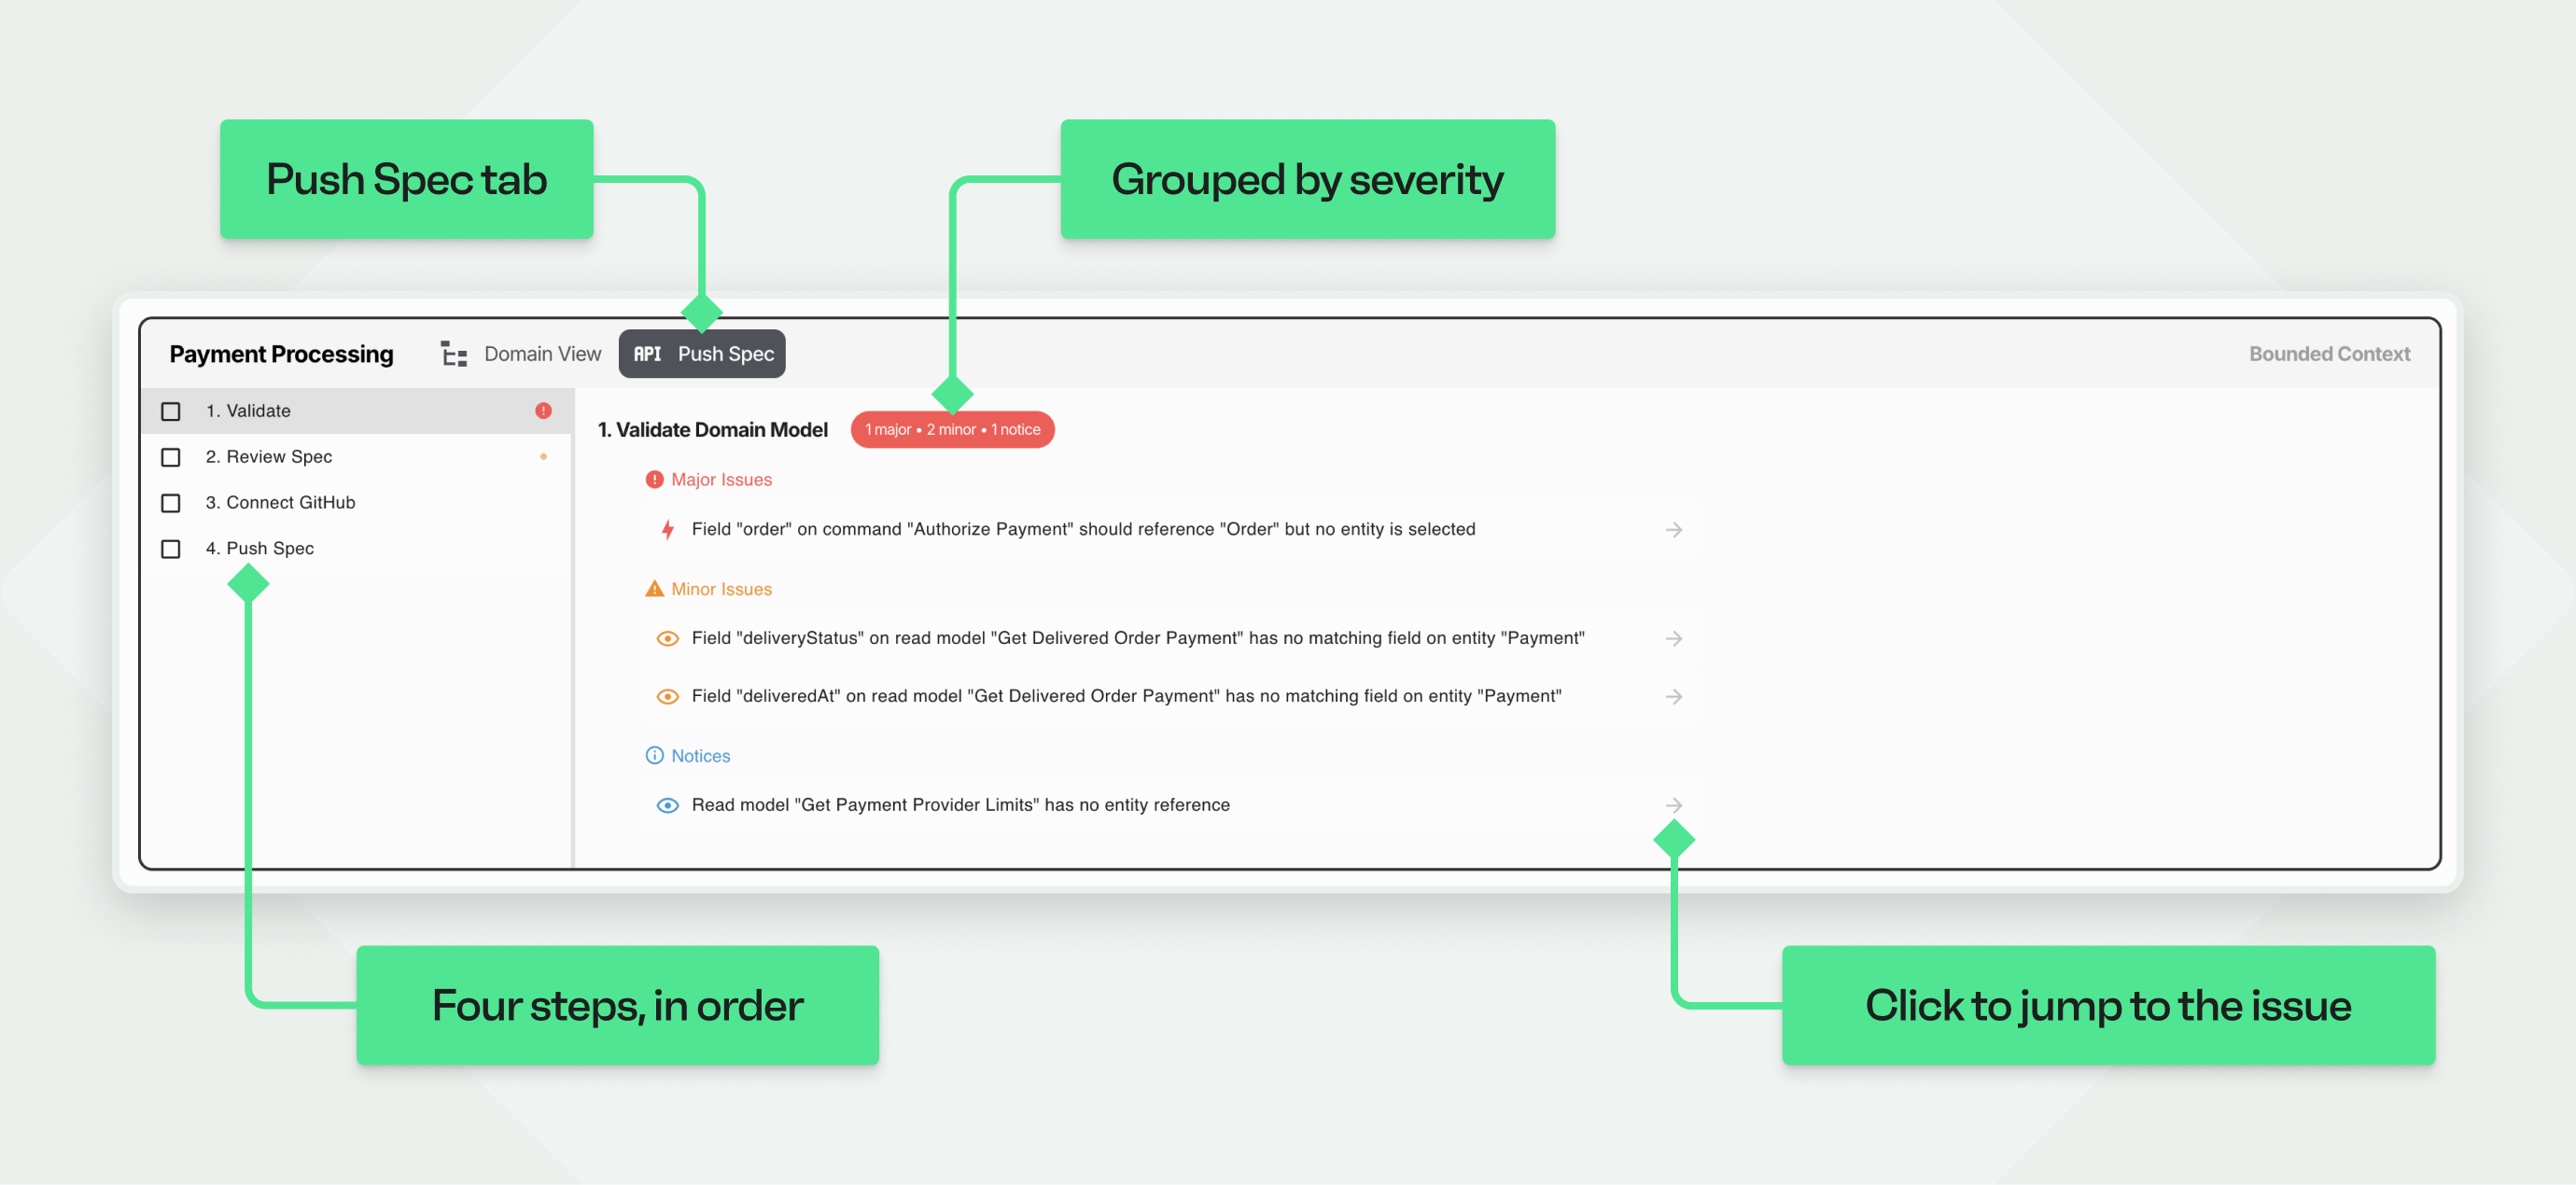
Note: Validation is advisory. You can push a model that still has open issues, and your agent runs its own pre-flight scan and asks about anything it cannot resolve.
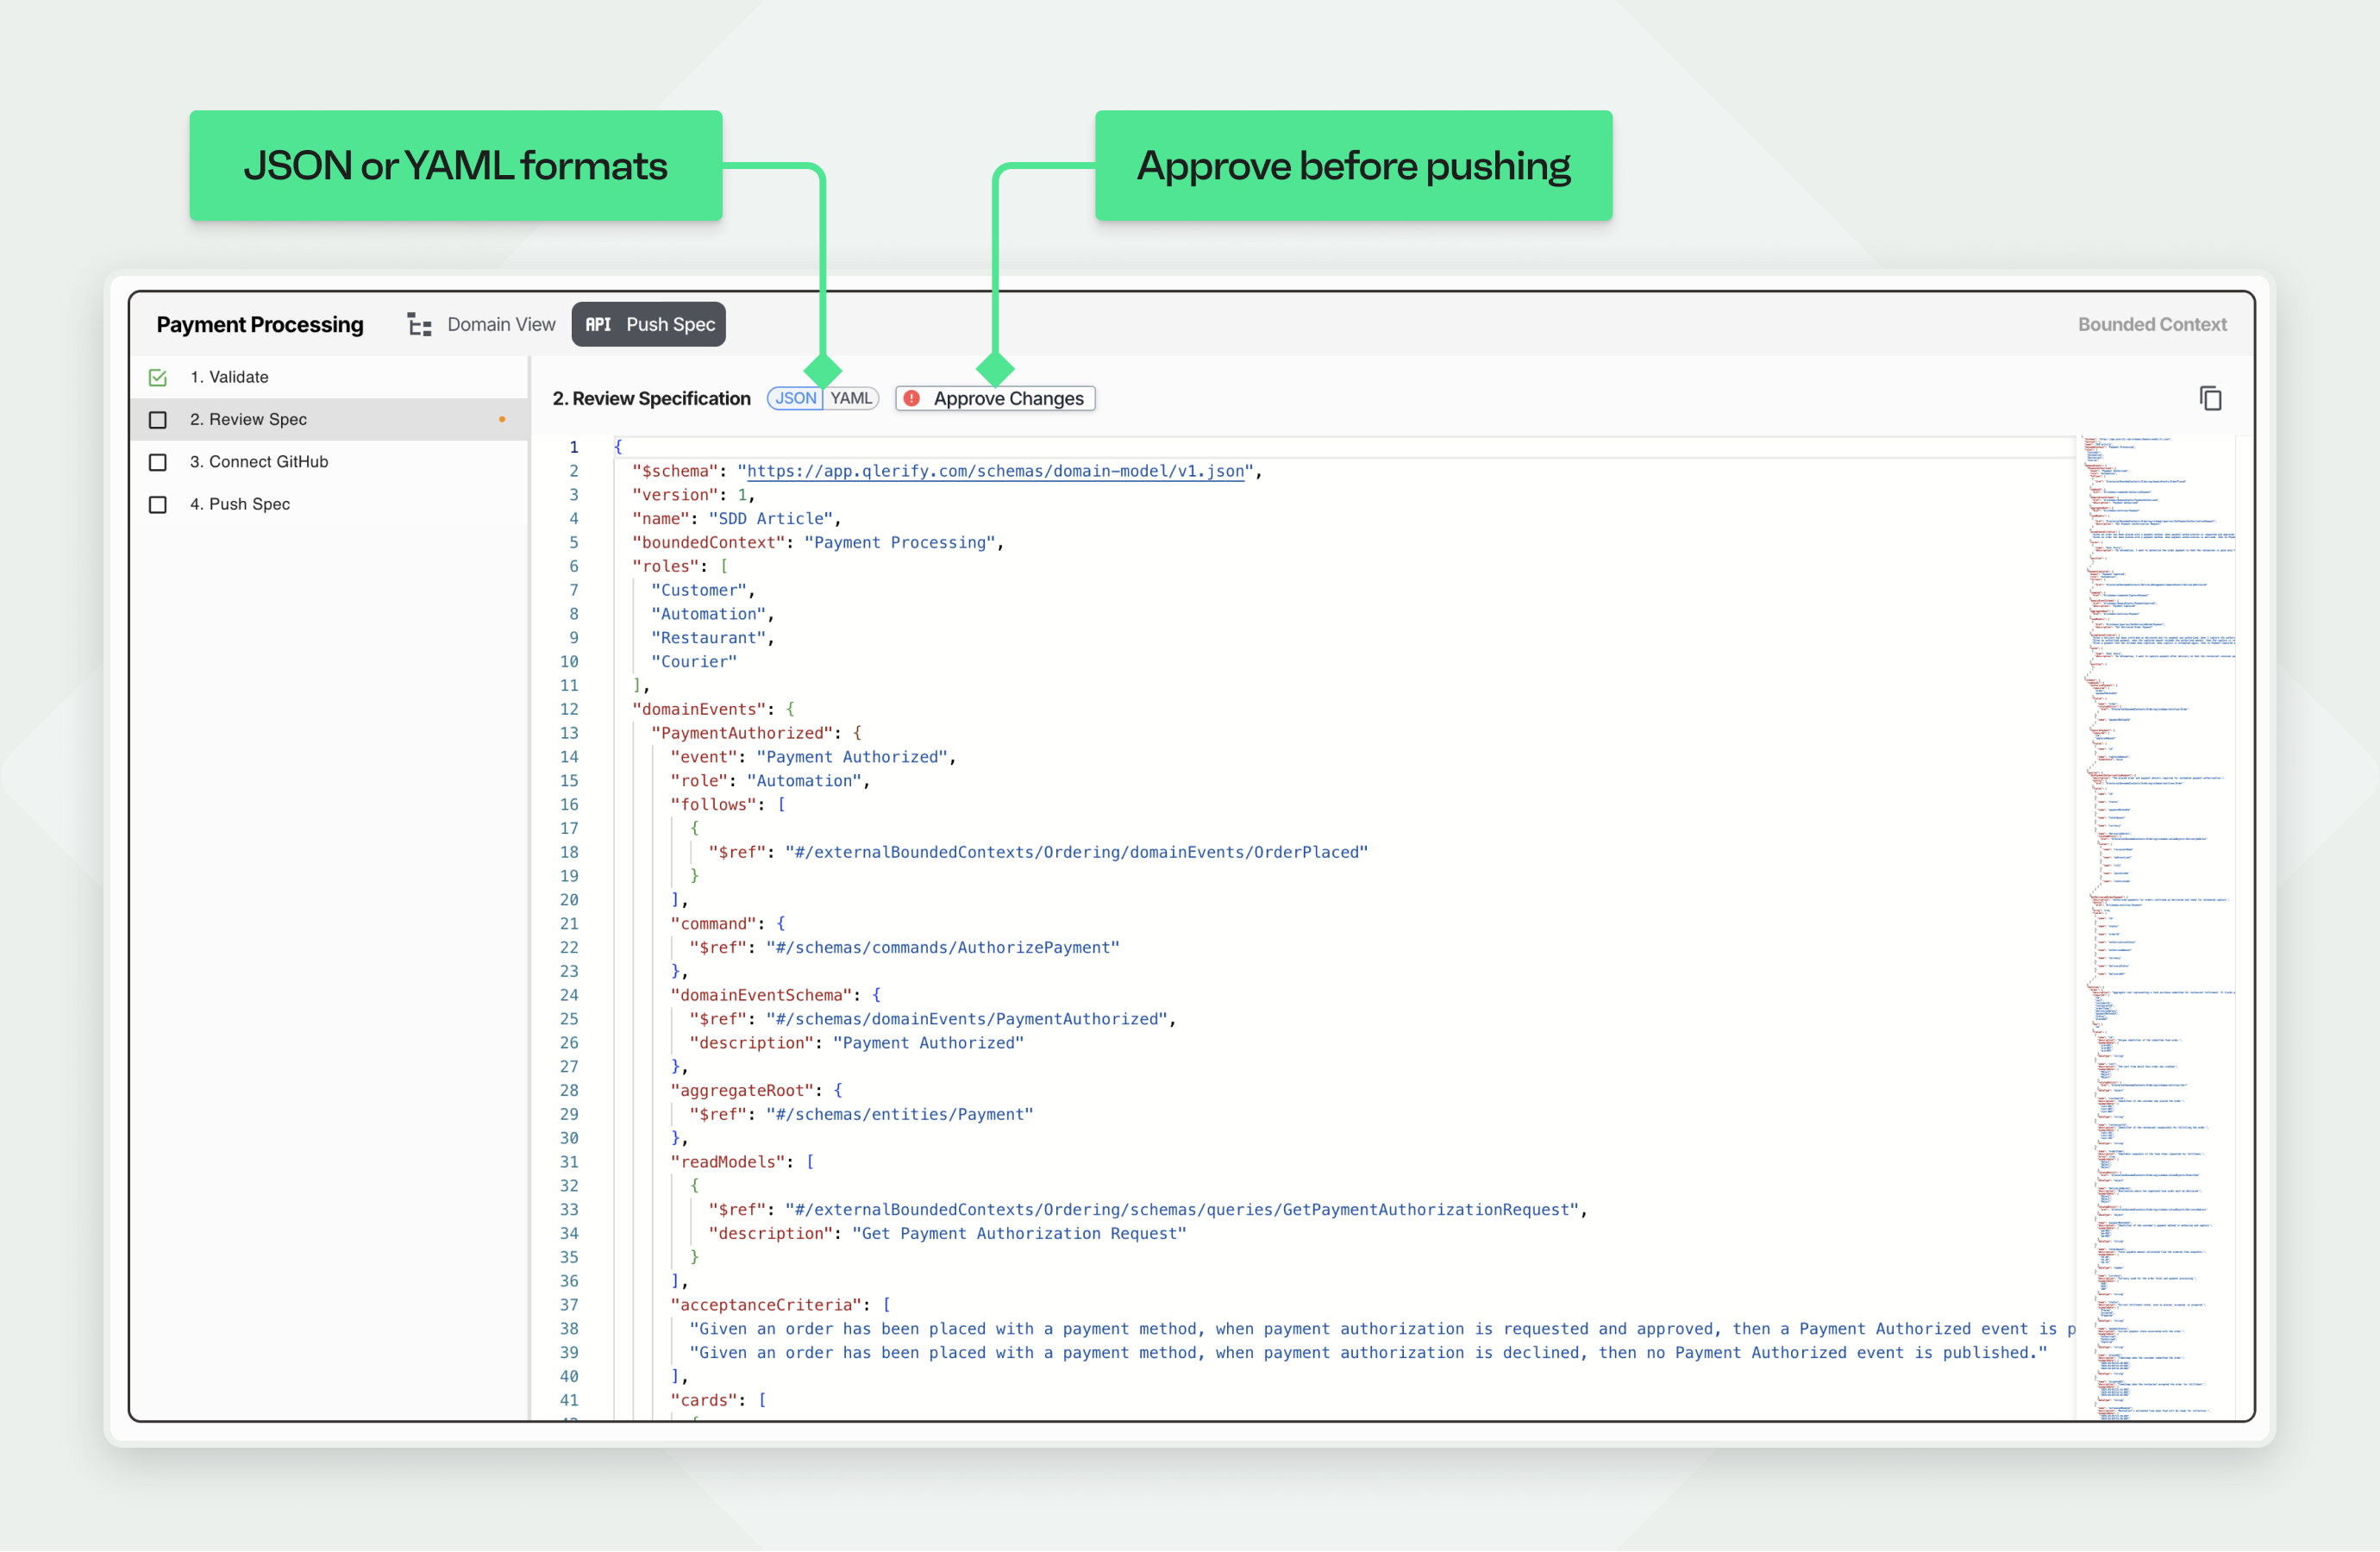
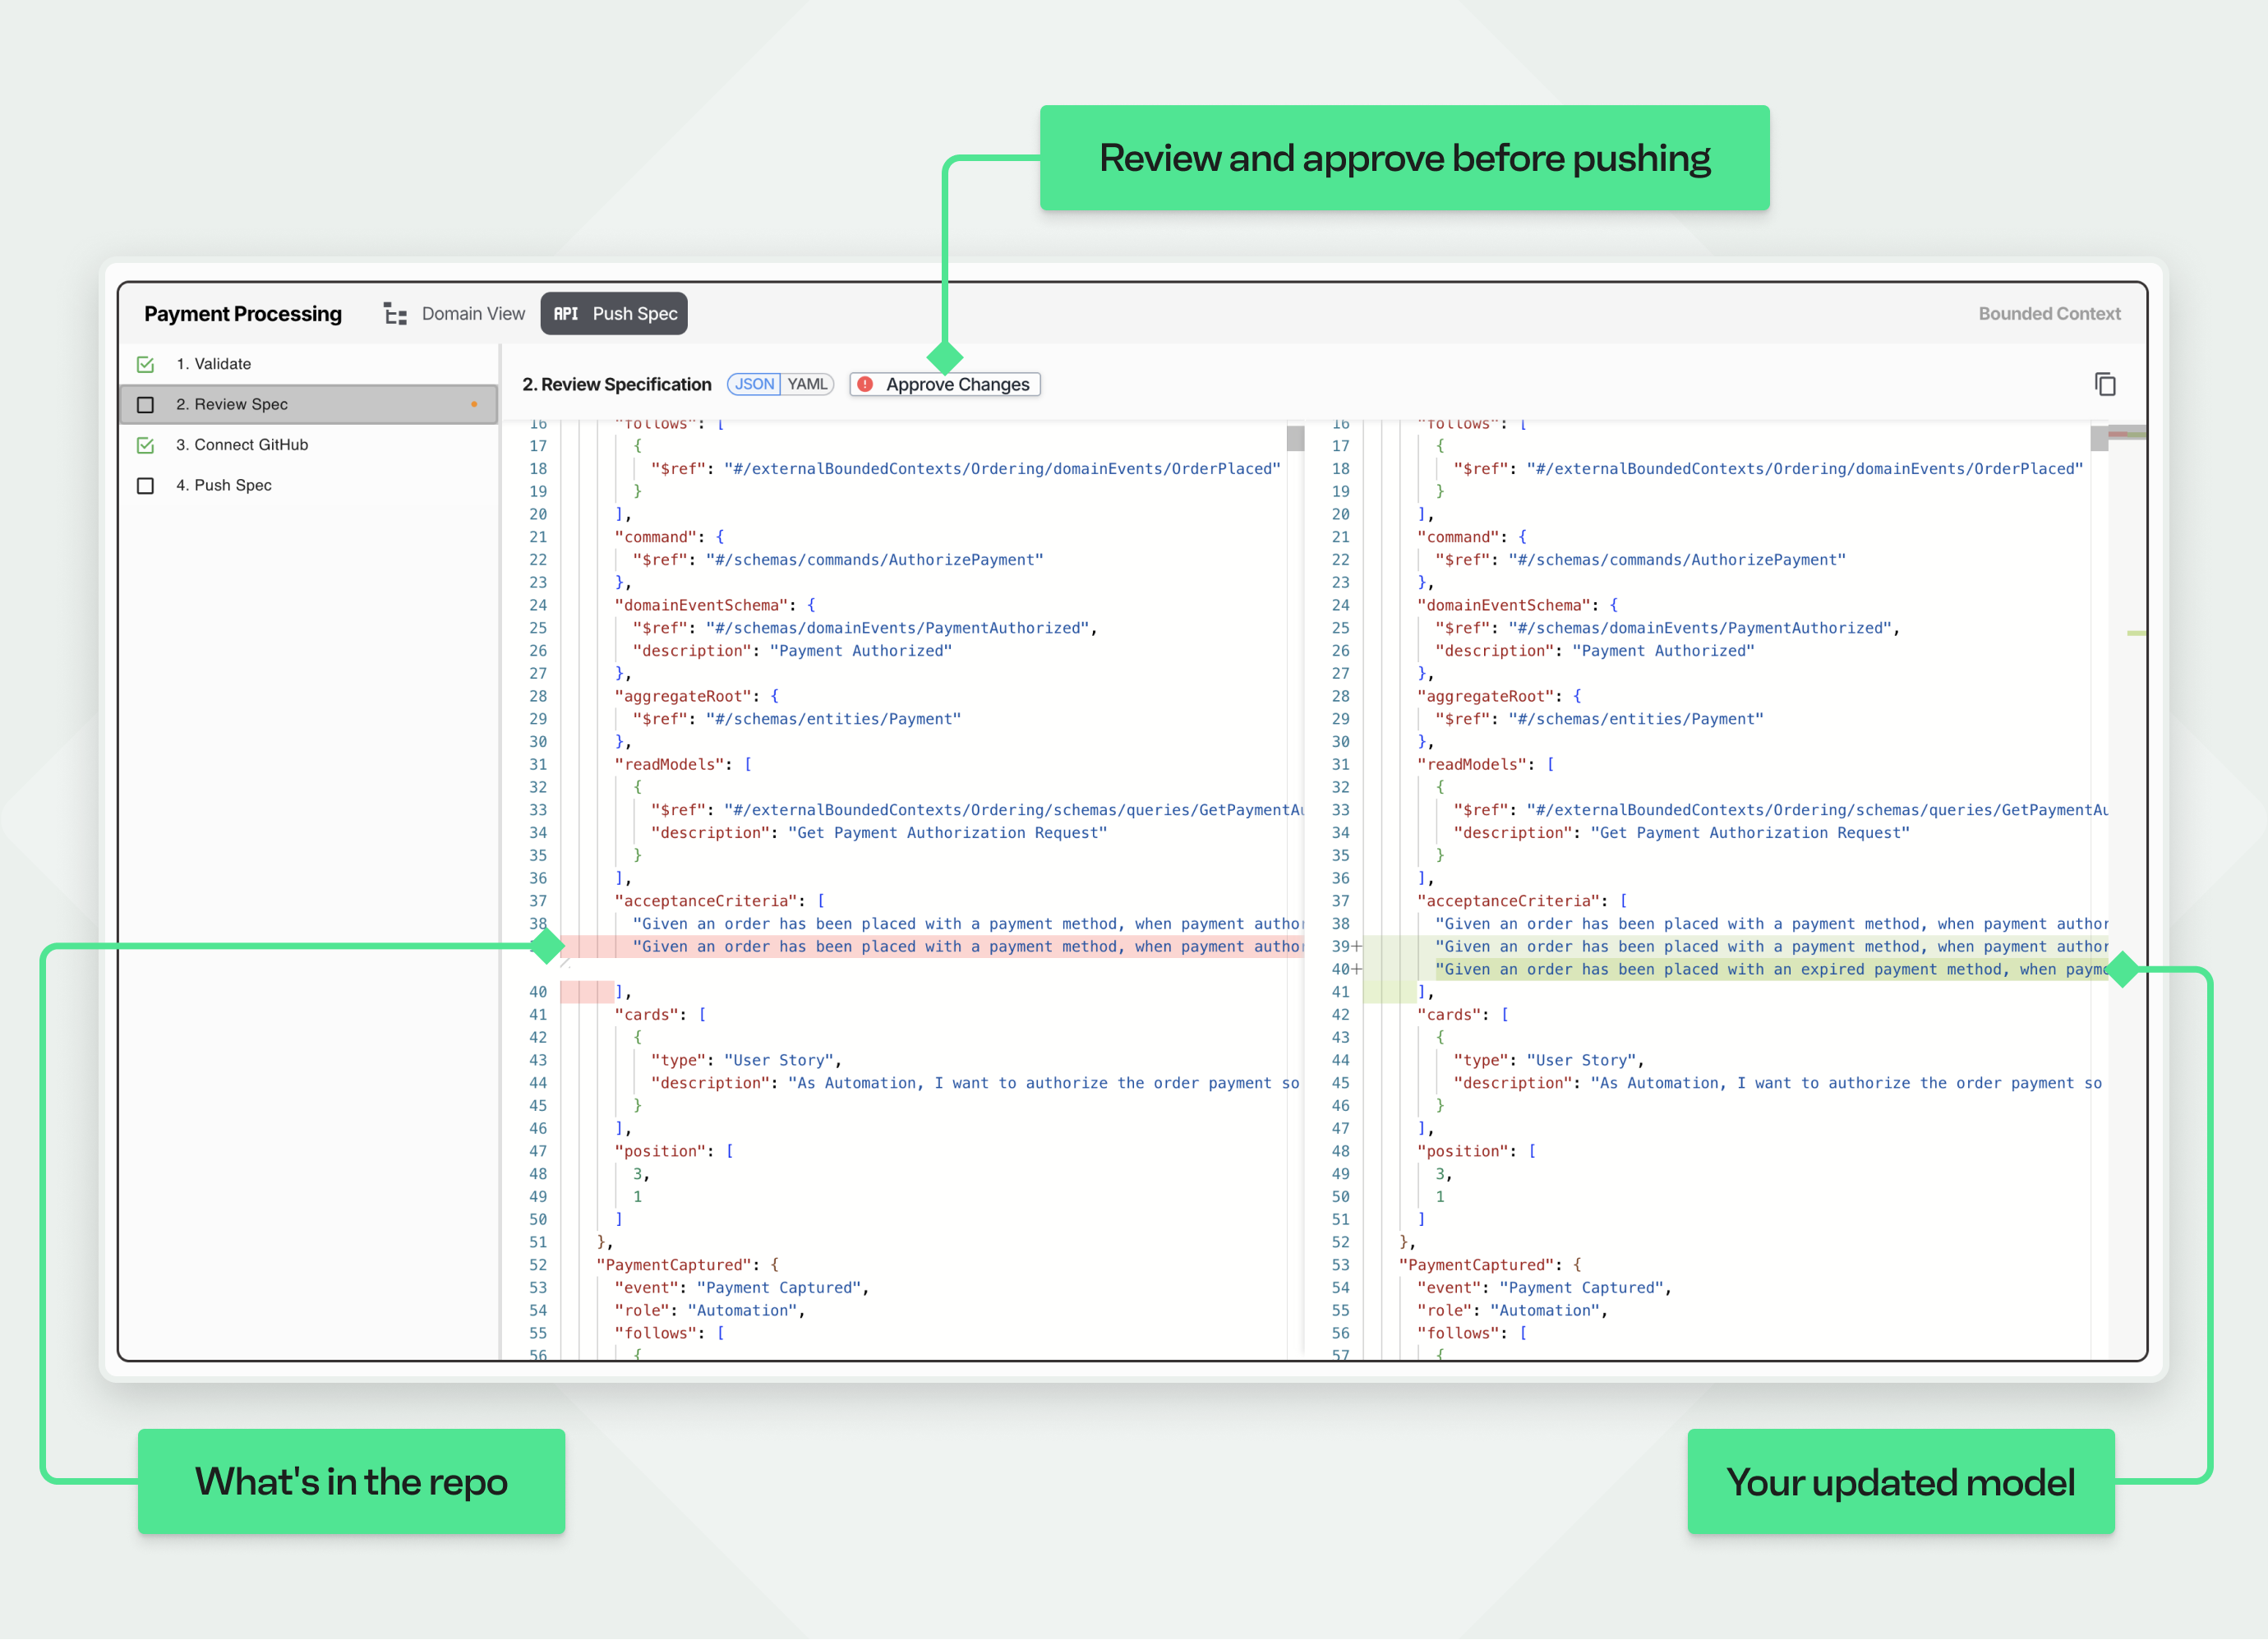
Review Spec shows the exact file you will push. You can toggle between JSON and YAML.
If the repository already contains an older version of the file, this step shows a diff instead, so you can see what changed since the last push.
Click Approve Changes when the specification is correct. The push button stays disabled until you approve, which keeps an unreviewed model out of your repository.
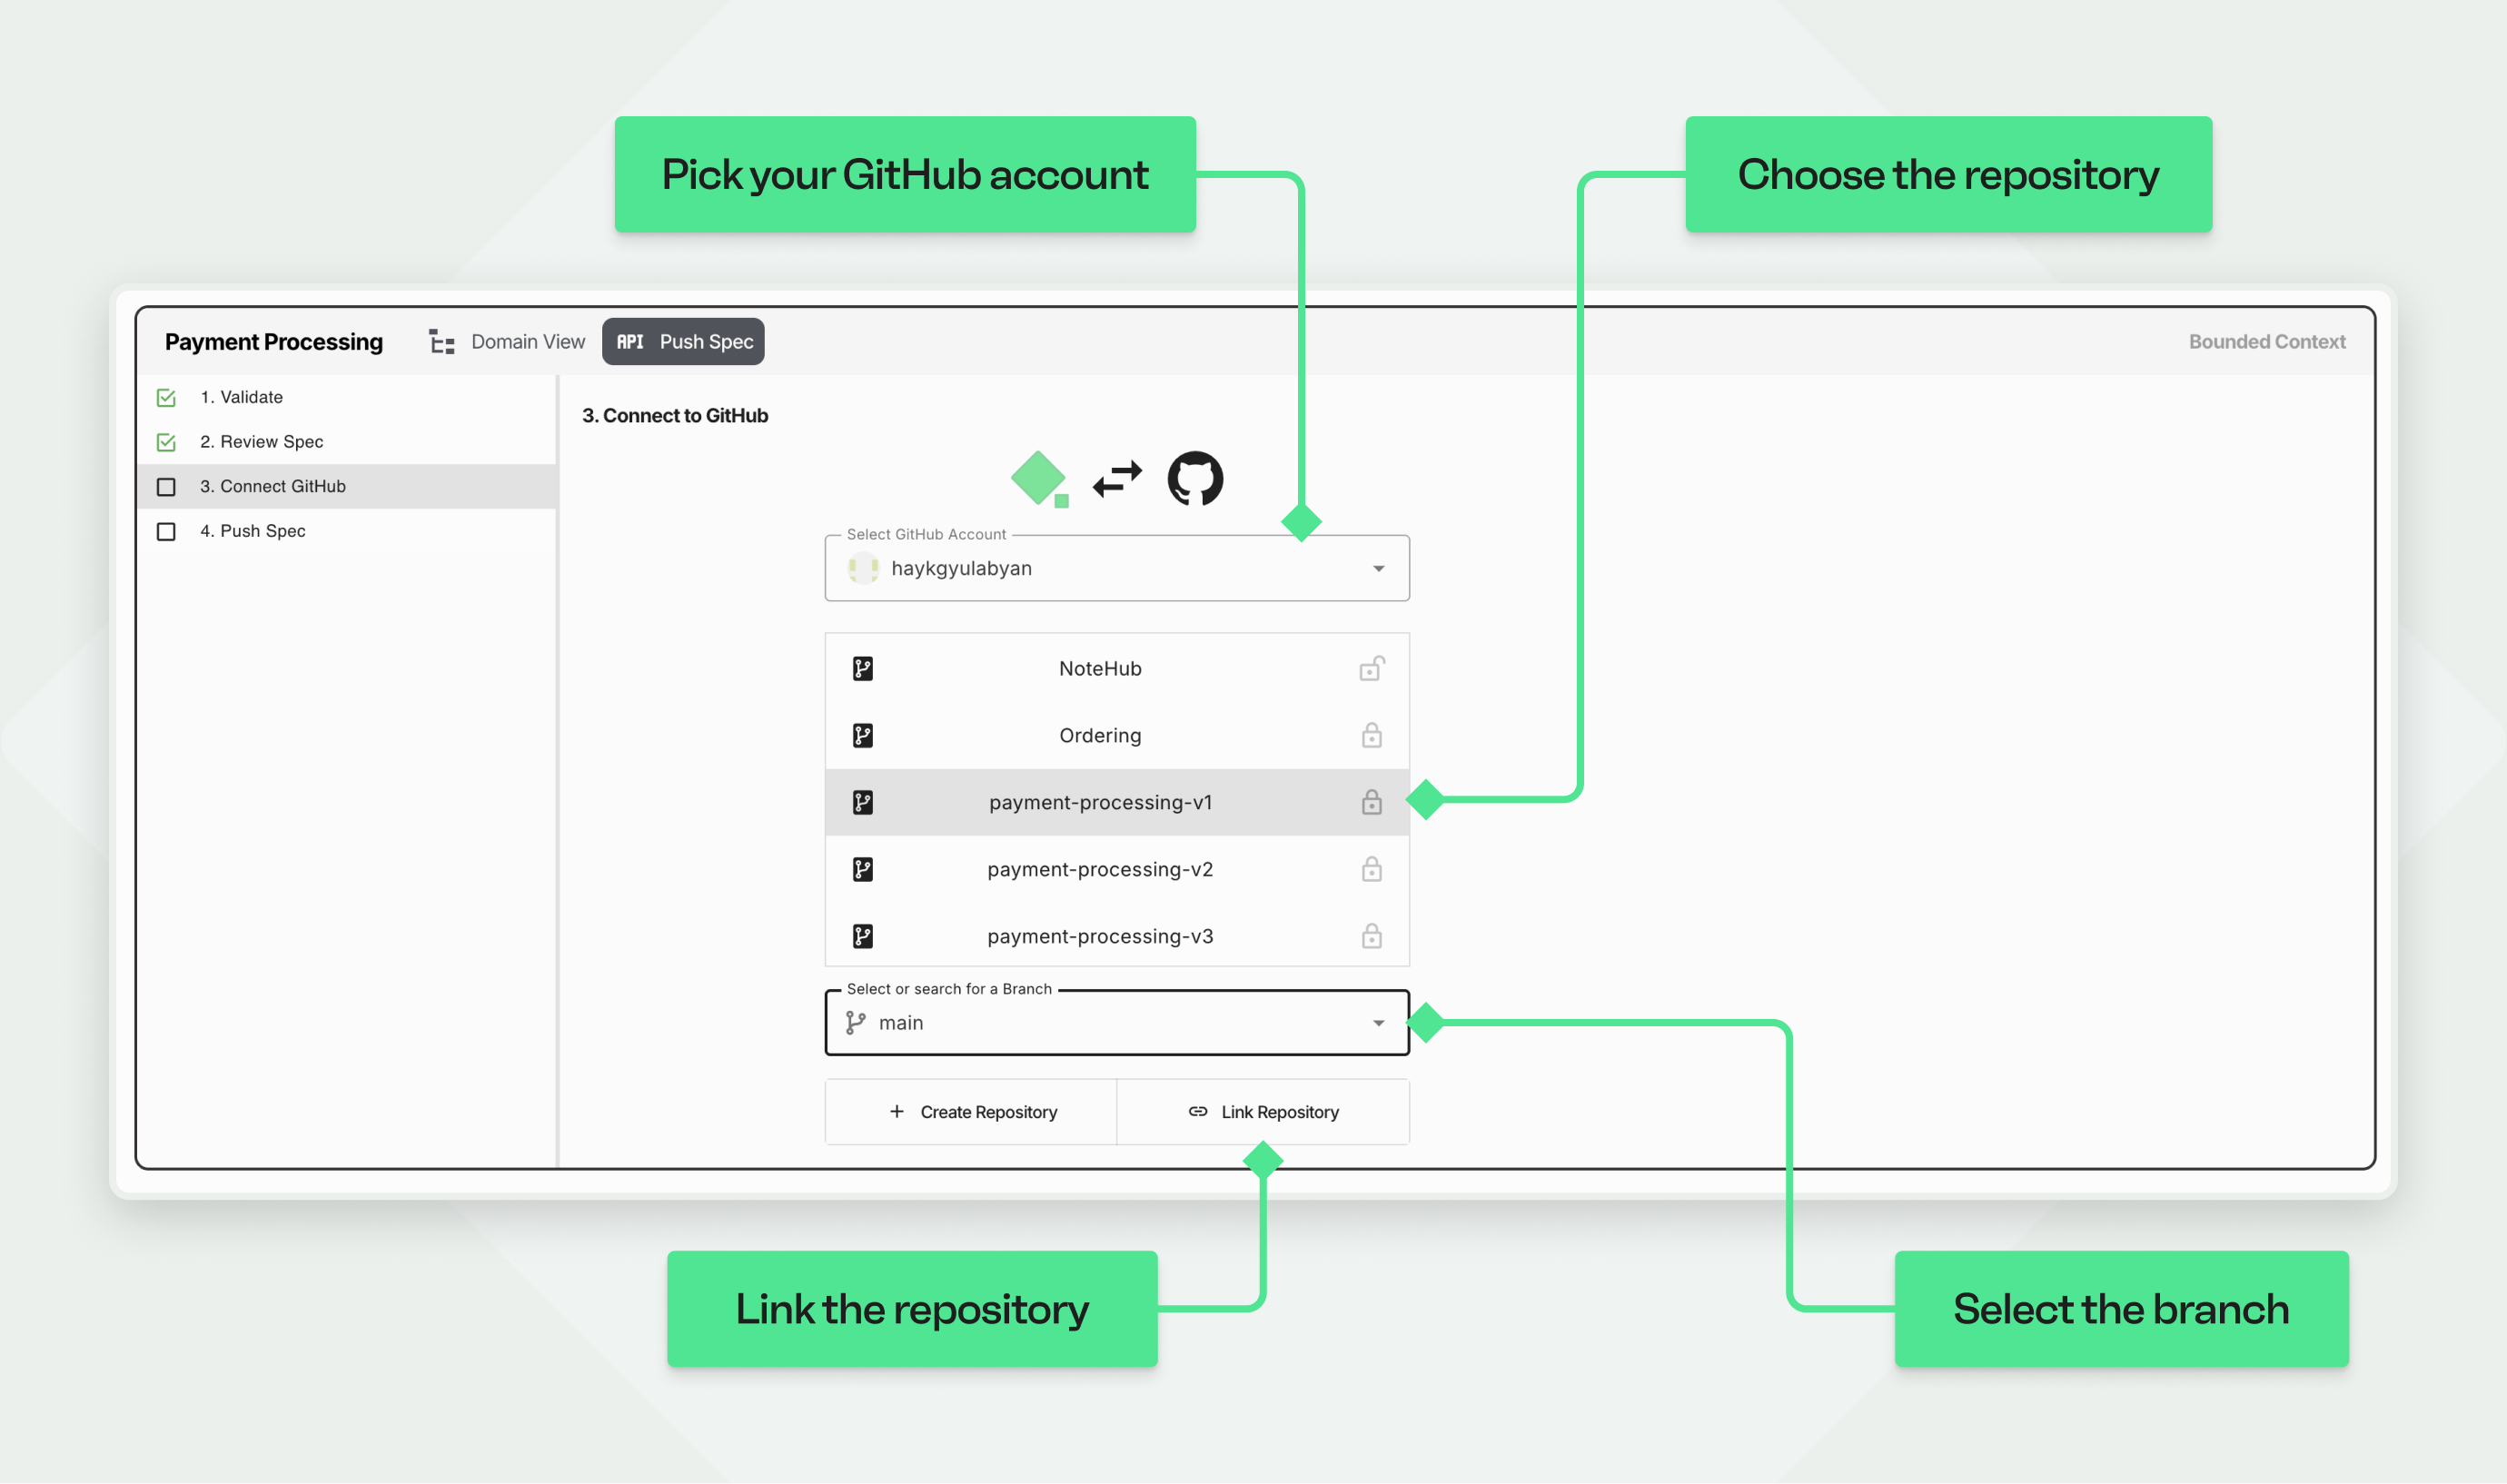
Connect to GitHub links the bounded context to a repository. Pick an account, choose an existing repository or create a new one, and select a branch.
Use the repository that contains your application code, so the model and the code stay together.
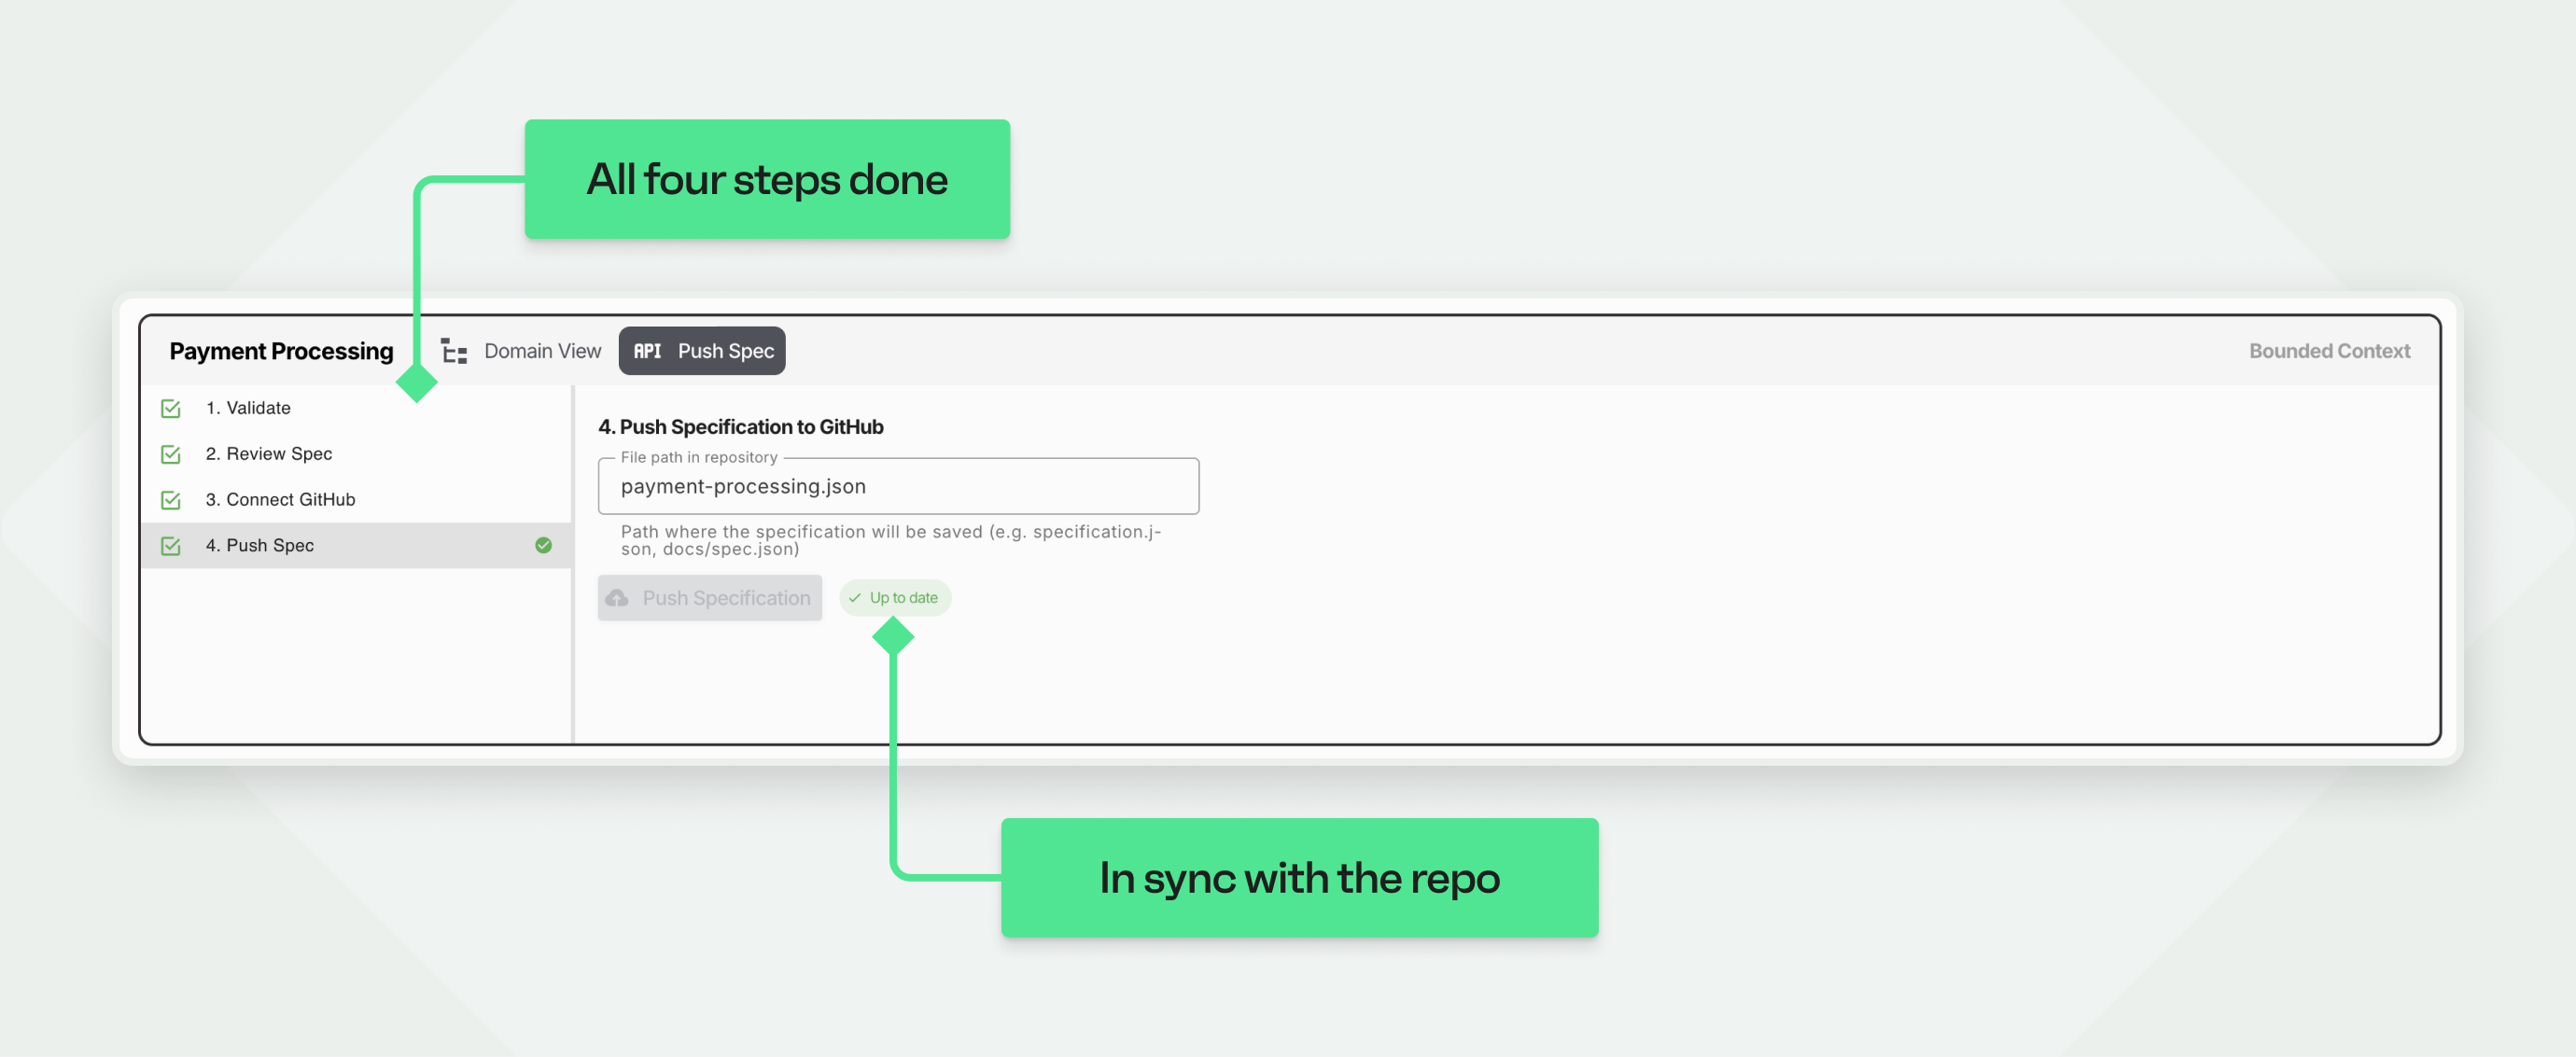
Push Specification to GitHub asks for a File path in repository. The default is qlerify-domain-model.json. If you plan to push more than one context, name each file after its context, for example orders-domain-model.json.
Click Push Specification. When the file in the repository matches the model in Qlerify, the step shows Up to date.
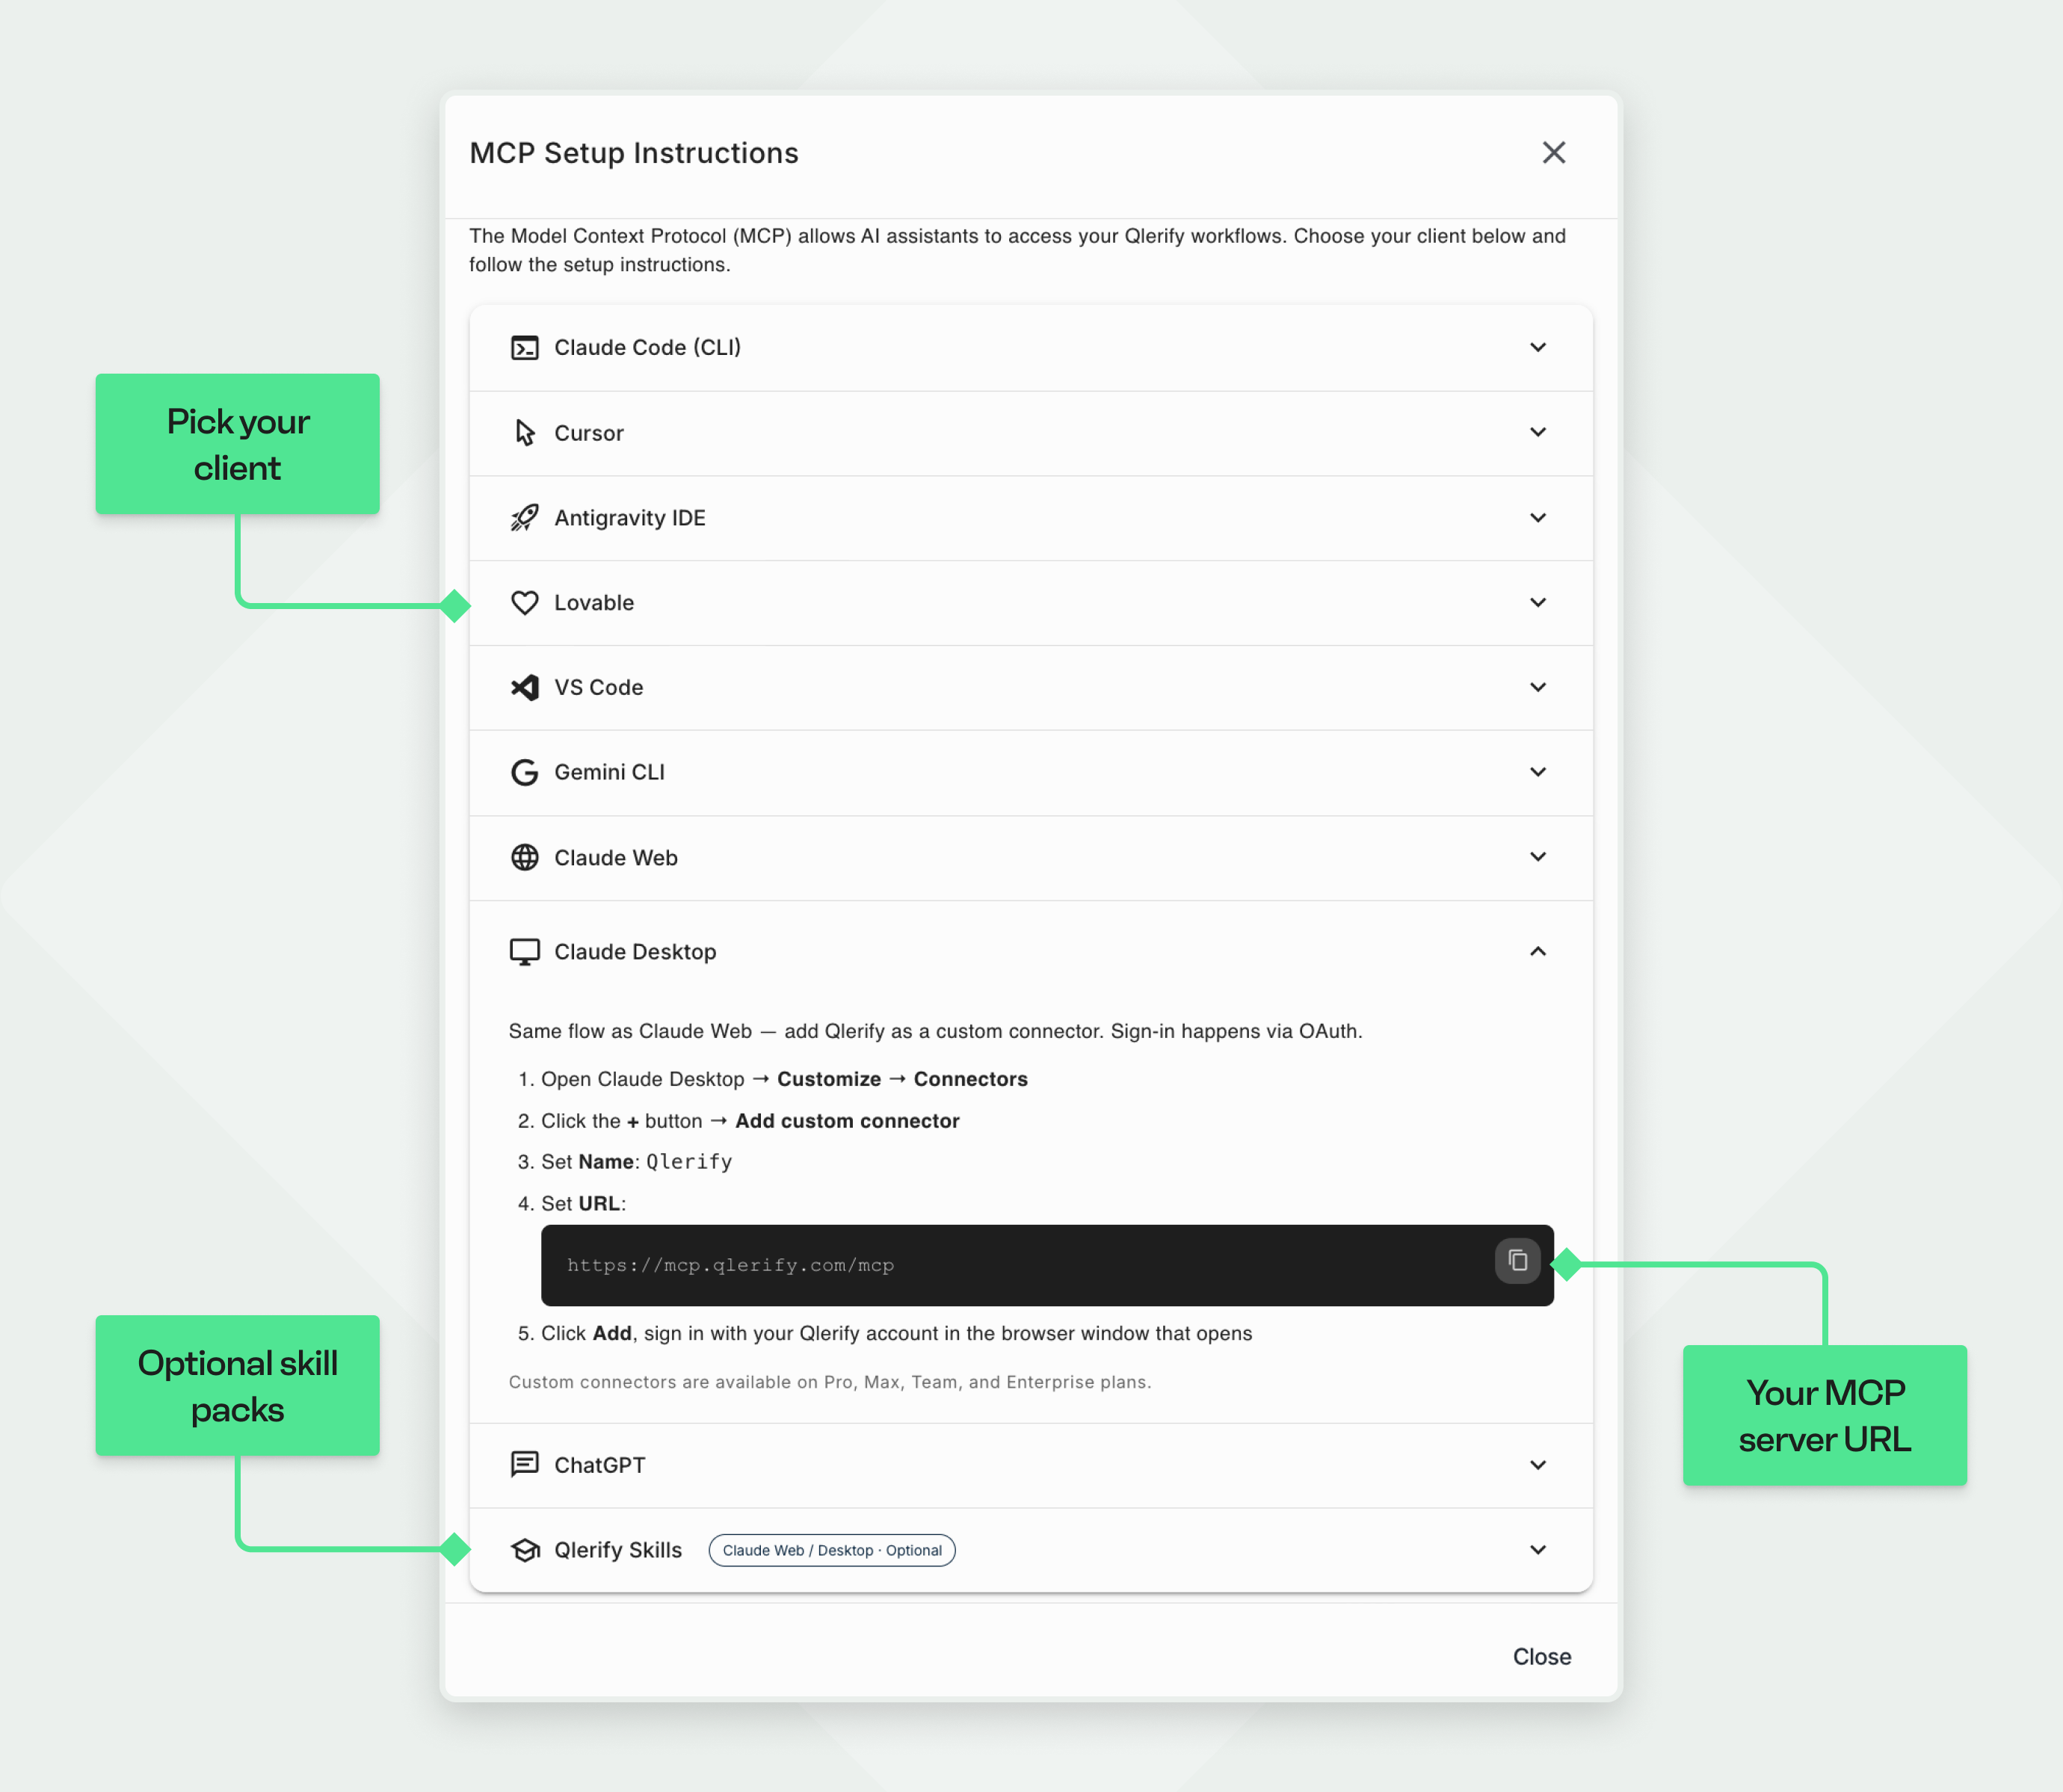
Your agent can now read the specification from the repository. Connecting Qlerify over MCP also lets the agent read workflows directly and write changes back later.
claude mcp add --transport http qlerify https://mcp.qlerify.com \
--header "x-api-key: YOUR_API_KEY"
Then install the companion plugin, which adds the Qlerify skills:
/plugin marketplace add qlerify/qlerify-plugins
/plugin install mcp-companion@qlerify-plugins
The dialog has equivalent instructions for Cursor, Antigravity IDE, Lovable, VS Code, Gemini CLI, Claude Web, Claude Desktop and ChatGPT.
Clone the repository, start your agent in that folder, and run:
/code-generationThe agent works through six phases:
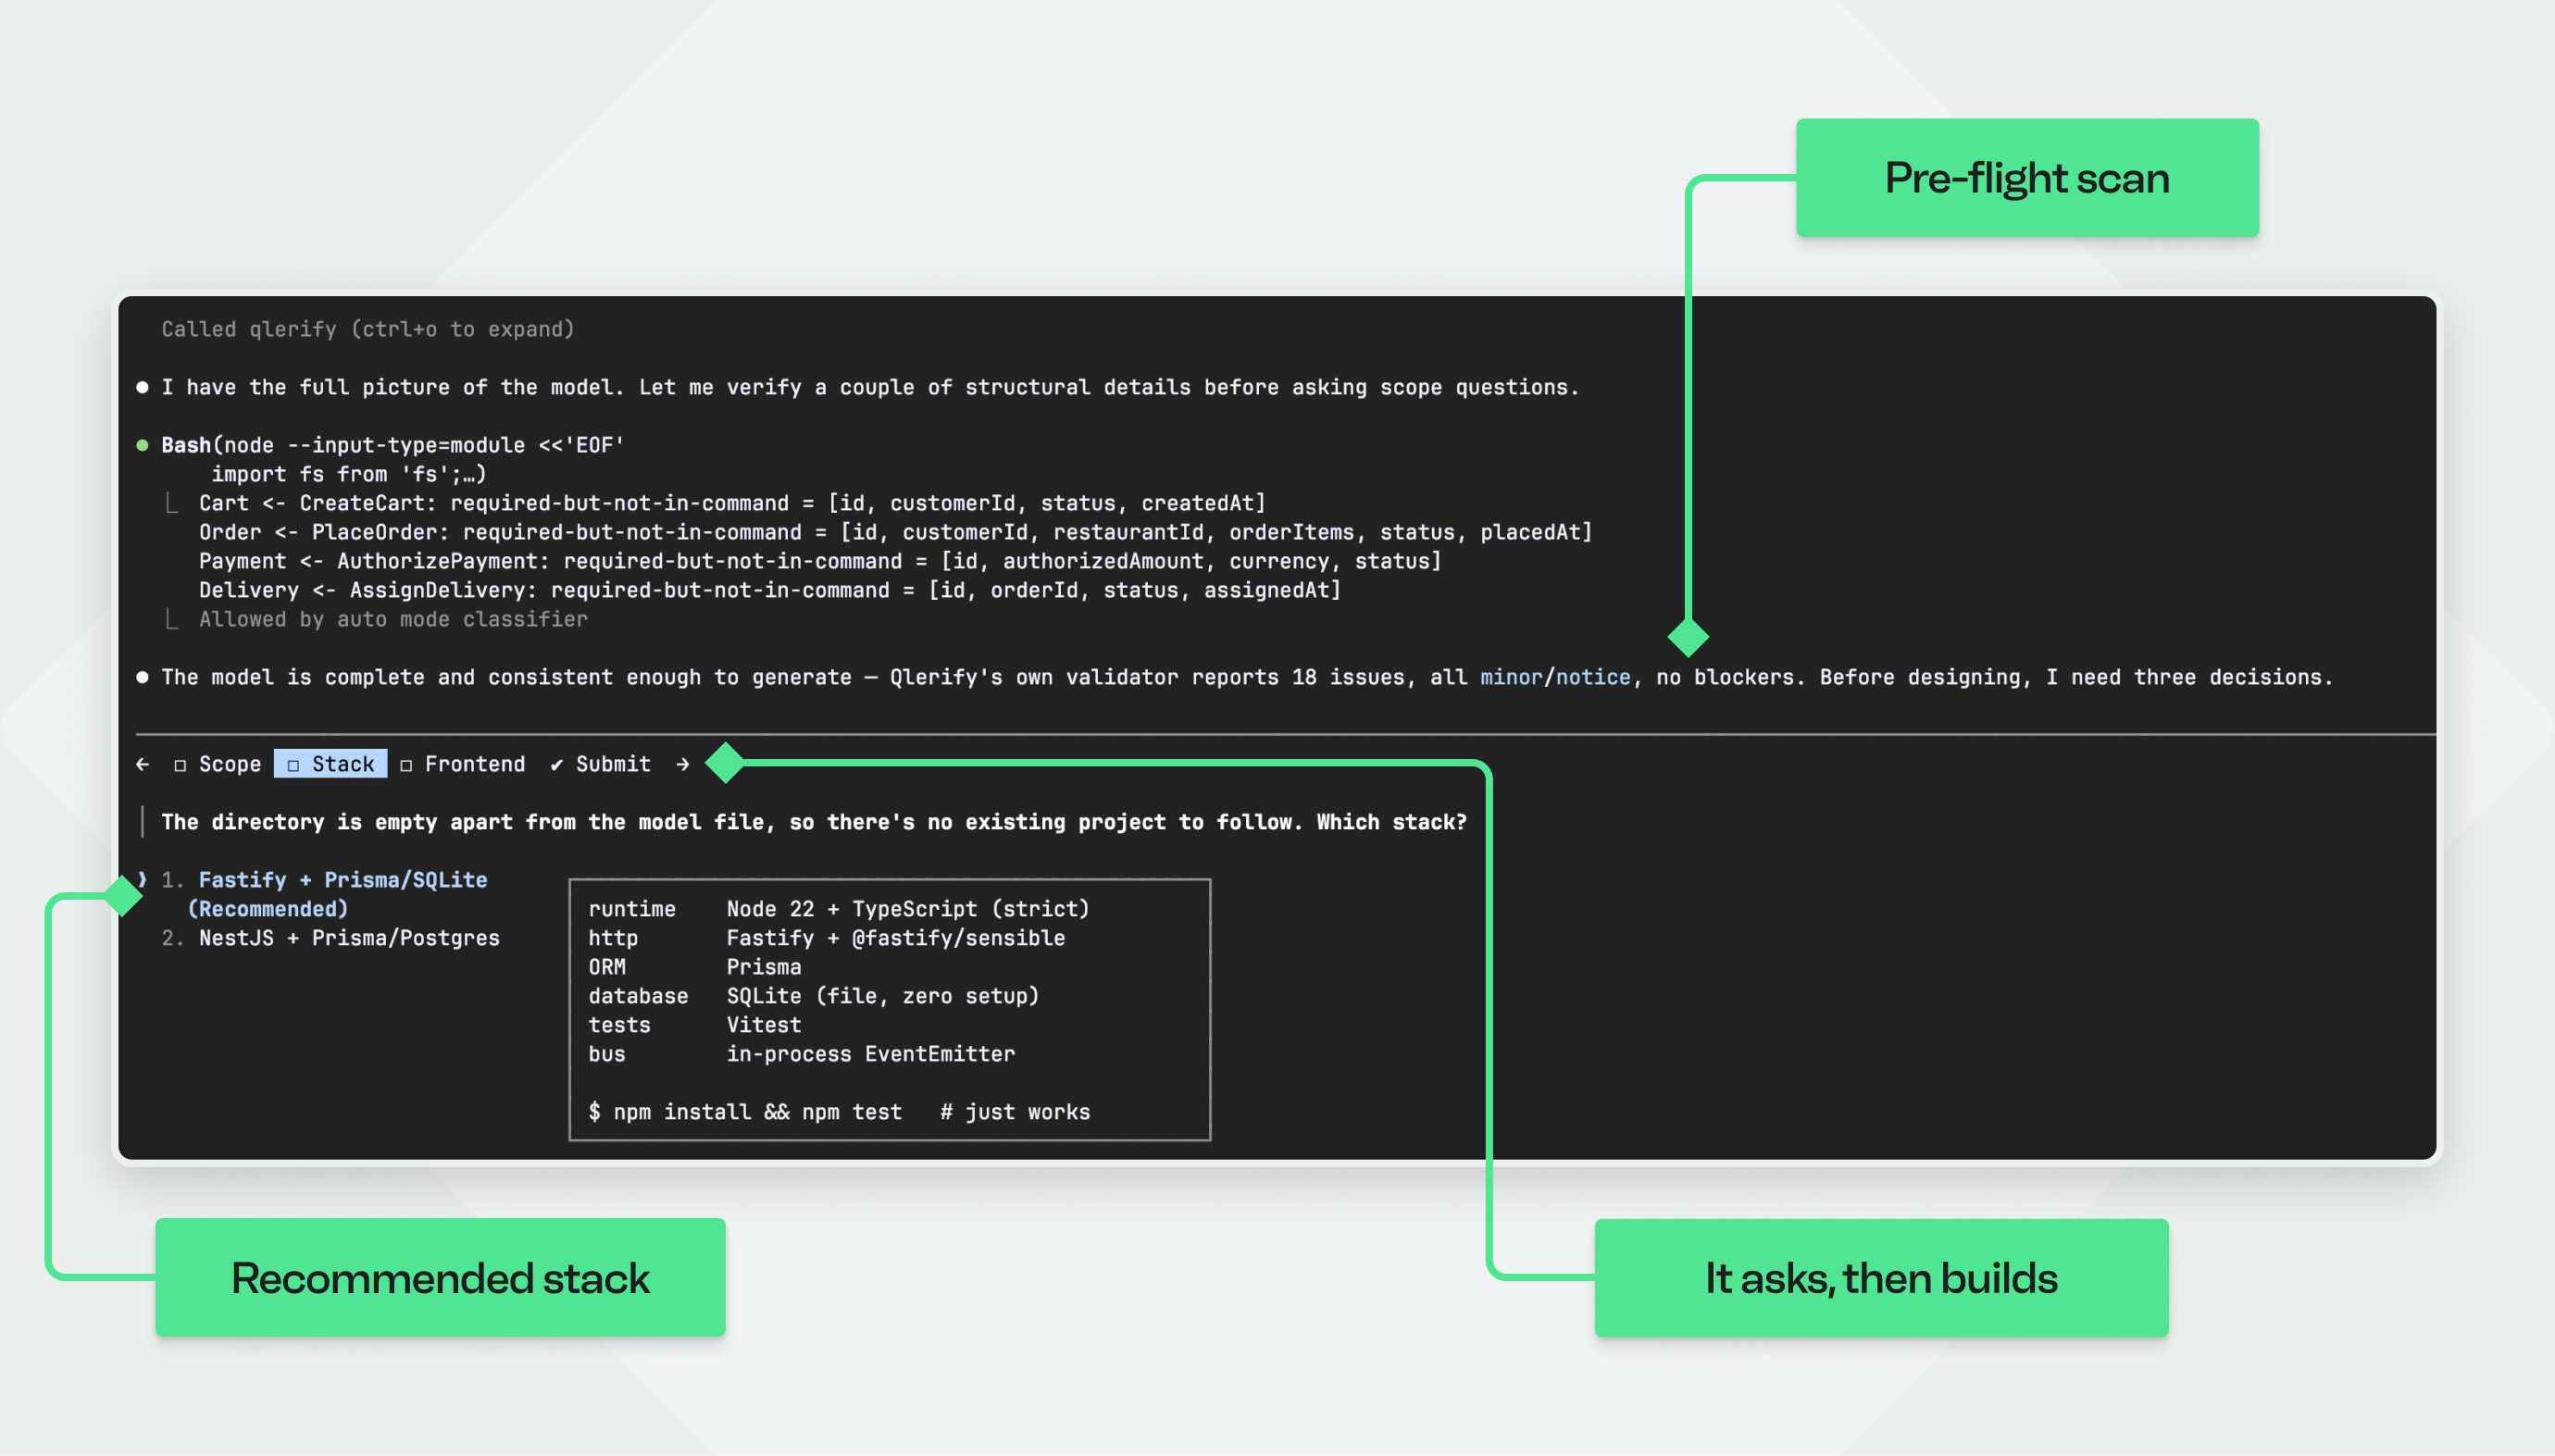
How long a run takes depends on the size of the bounded context and the stack you choose. The agent finishes when the test suite passes or when it stops to ask you about a test it could not fix.
The agent leaves two files in .qlerify: a copy of the model it built from, and codegen.json, which records the stack and the persistence decisions it made. Step 7 uses these files as a reference point.
The model is only useful if it stays accurate. Run:
/syncSync works in both directions. Change the code, and it reads the new entities, endpoints, schemas and events and applies them to the Qlerify model. Change the model, and it detects the drift and hands off to code generation.
Two habits keep this working over time:
Note: You can import the specification file back into Qlerify at any time to recreate the full workflow and domain model, so the file also serves as a record of the system.

Model the process with your team. Validate it. Push it. Let your coding agent build the app and keep the model and the code aligned as the system grows.
Your coding agent is good at writing code. Give it a clear specification to work from. Sign up for a free Qlerify account and build applications in days.


