User Story Mapping is a powerful planning technique used in software development—and beyond—to visualize product backlogs in the context of an end-to-end user journey. It ensures a shared understanding of project goals and priorities.
In this guide, we’ll walk through how to create a User Story Map in Qlerify, a modern user story mapping tool with built-in AI support.
A User Story Map is a visual representation of the steps users take when interacting with a system. While traditional story mapping relies on sticky notes or index cards, AI-powered tools like Qlerify streamline the process, making it faster and more collaborative.
The key benefit of a story map is that it fosters better discussions among team members, leading to smarter prioritization. Unlike a flat backlog, which often obscures the big picture, a User Story Map structures the narrative of a user’s journey, ensuring:
A User Story Map consists of three key elements:
Now that we’ve covered the basics, let’s dive into how to create a User Story Map in Qlerify using AI.
Log in to Qlerify or sign up for free and create a new project.
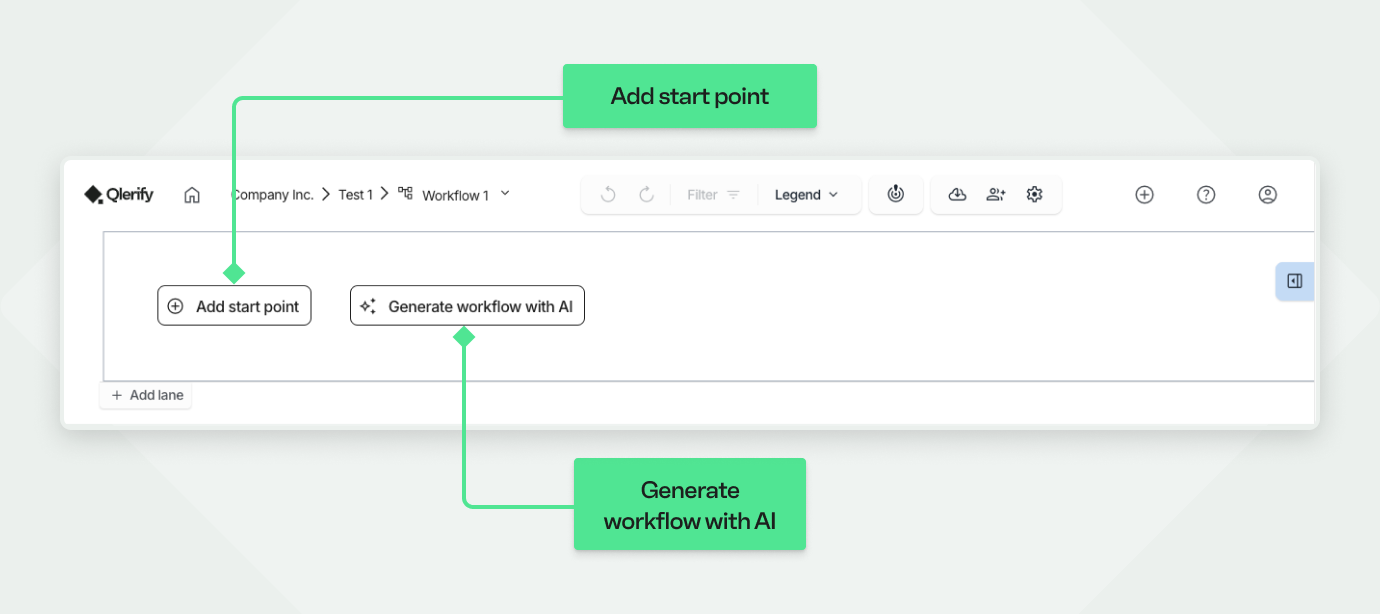
Create a new, empty Workflow and open it. You should see a view similar to the image below. This is your blank workspace, where you can Add a starting point or Generate a workflow with AI. You can also invite team members to collaborate on the project.
For more details about this view, click the question mark icon (top right).
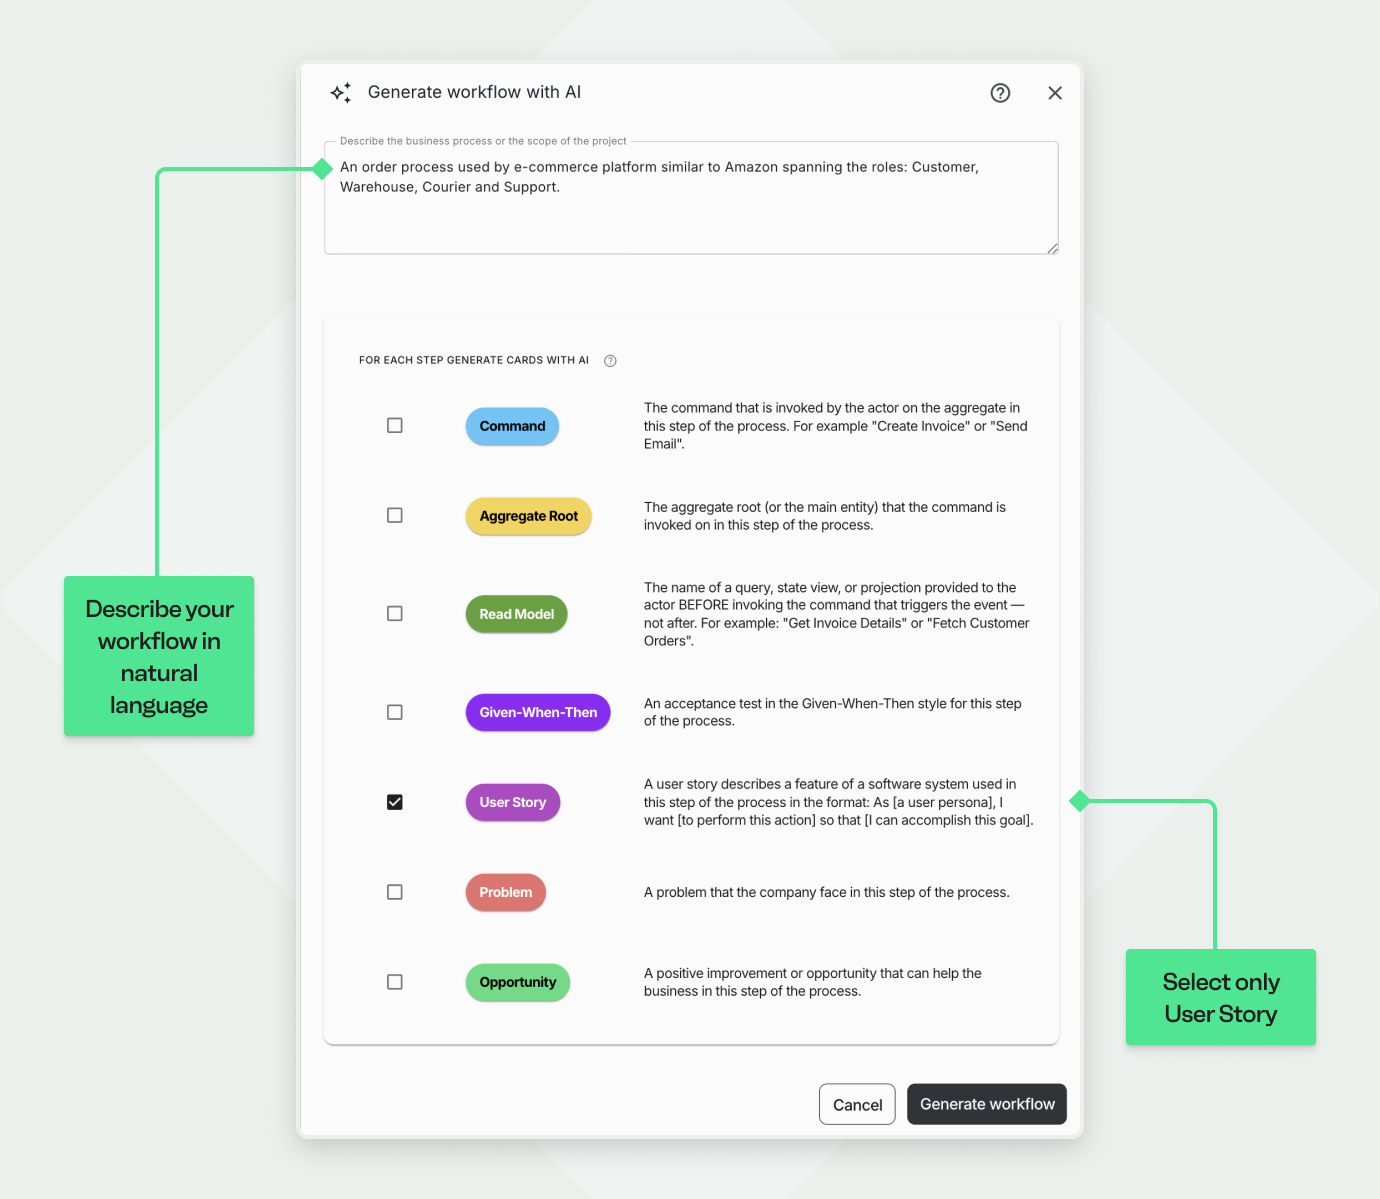
Click on “Generate Workflow with AI”. In the dialog that appears, click inside the text field at the top and describe your workflow in natural language.
You can use your own description, or try this example:
"An order process used by an e-commerce platform similar to Amazon, spanning the roles: Customer, Warehouse, Courier, and Support."
Then, deselect all checkboxes that are checked by default, and instead check only “User Story.” Click “Generate Workflow.”
Once the AI finishes generating your workflow, switch to the “User Story Map” tab below the diagram. Your result will resemble the example shown earlier—though outcomes may vary.
💡 Tip: While Qlerify is a powerful User Story Mapping Tool with built-in AI, you can also create your map manually from scratch. In this walkthrough, we use AI to help you learn the basics quickly.
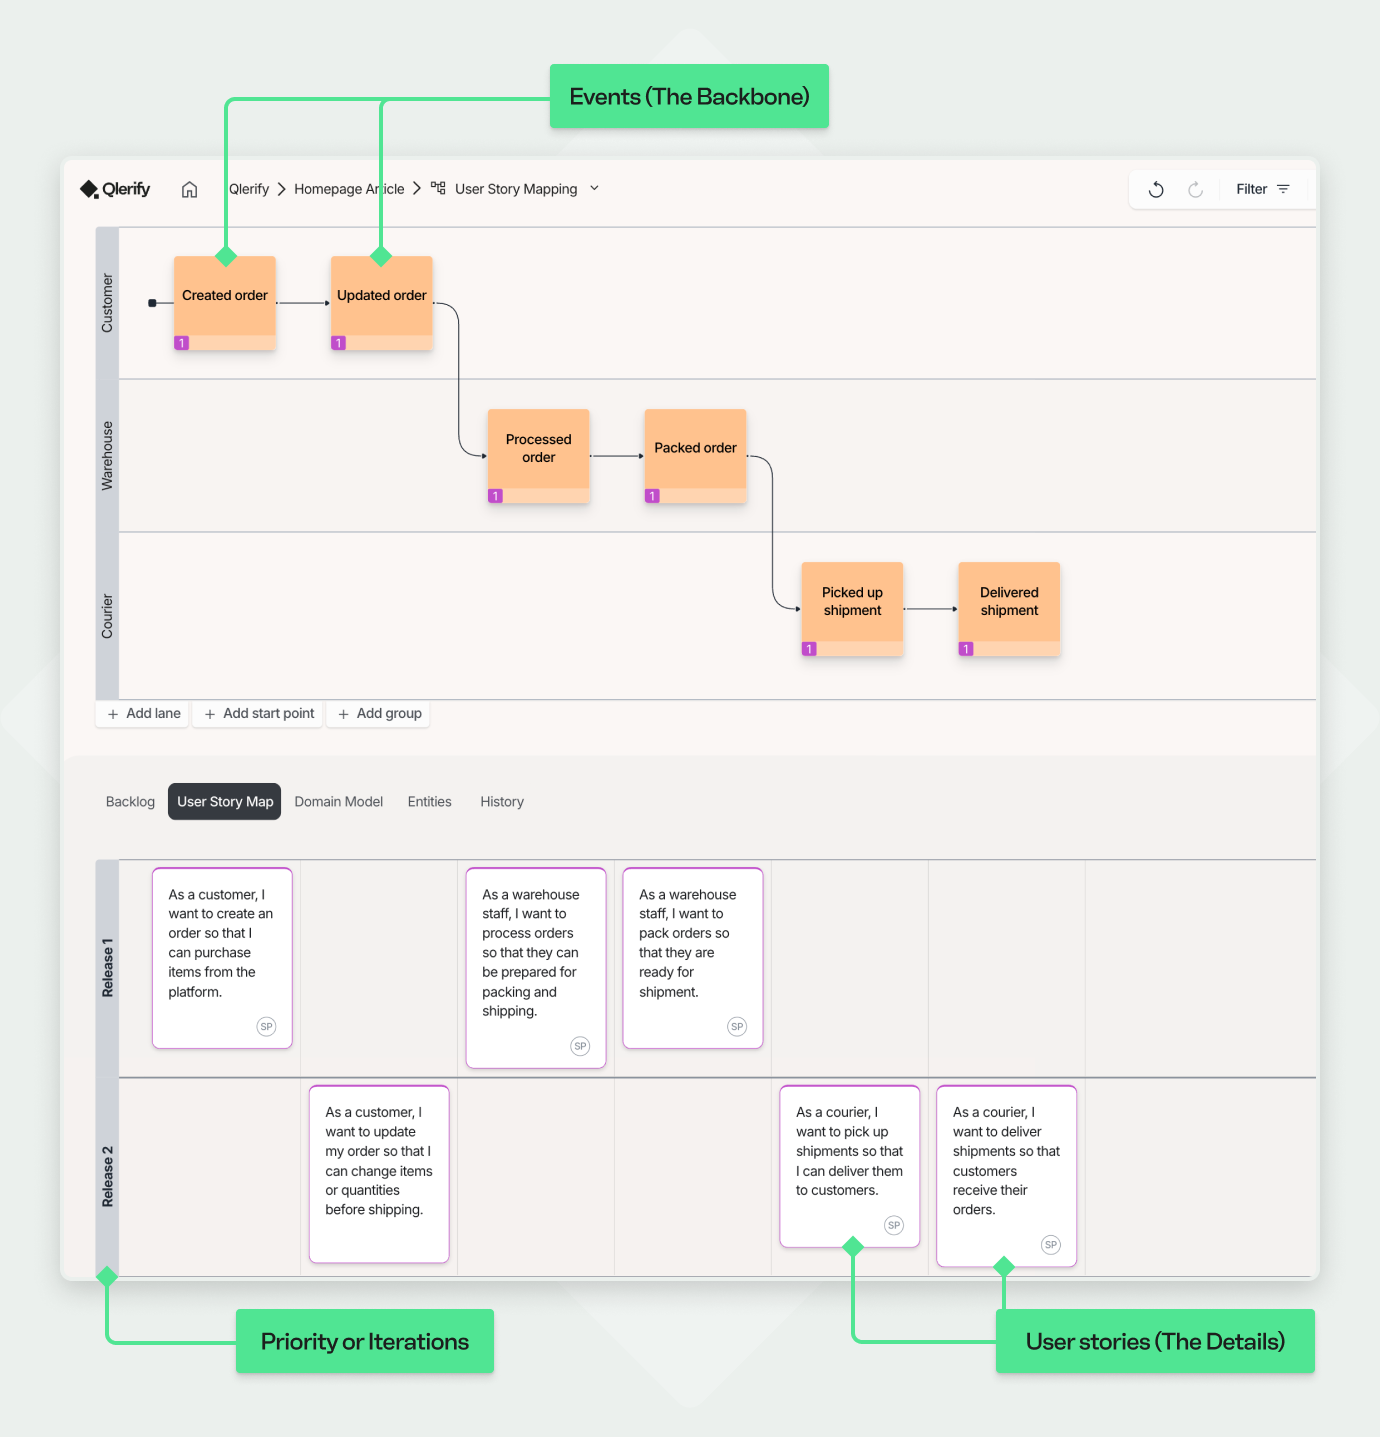
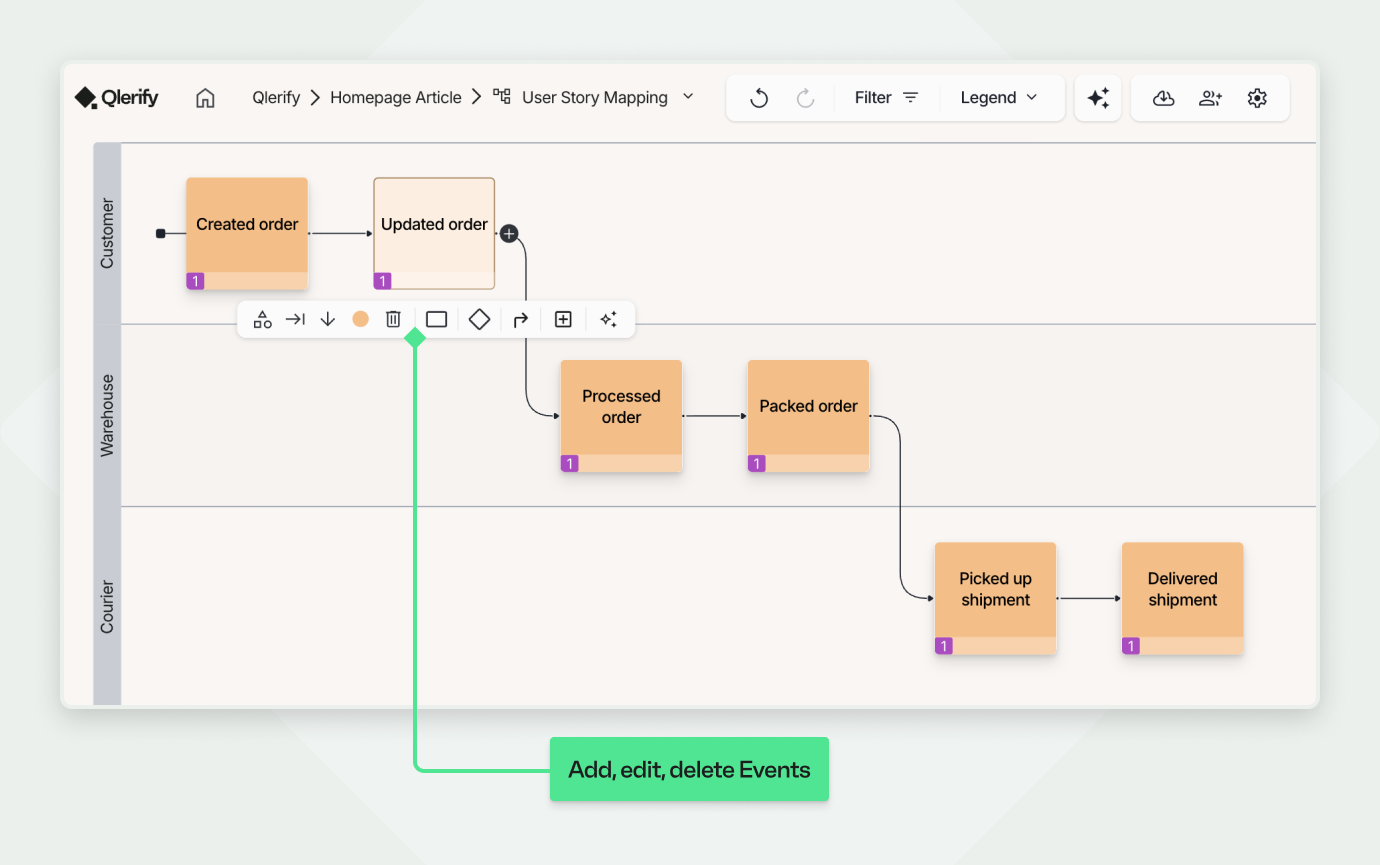
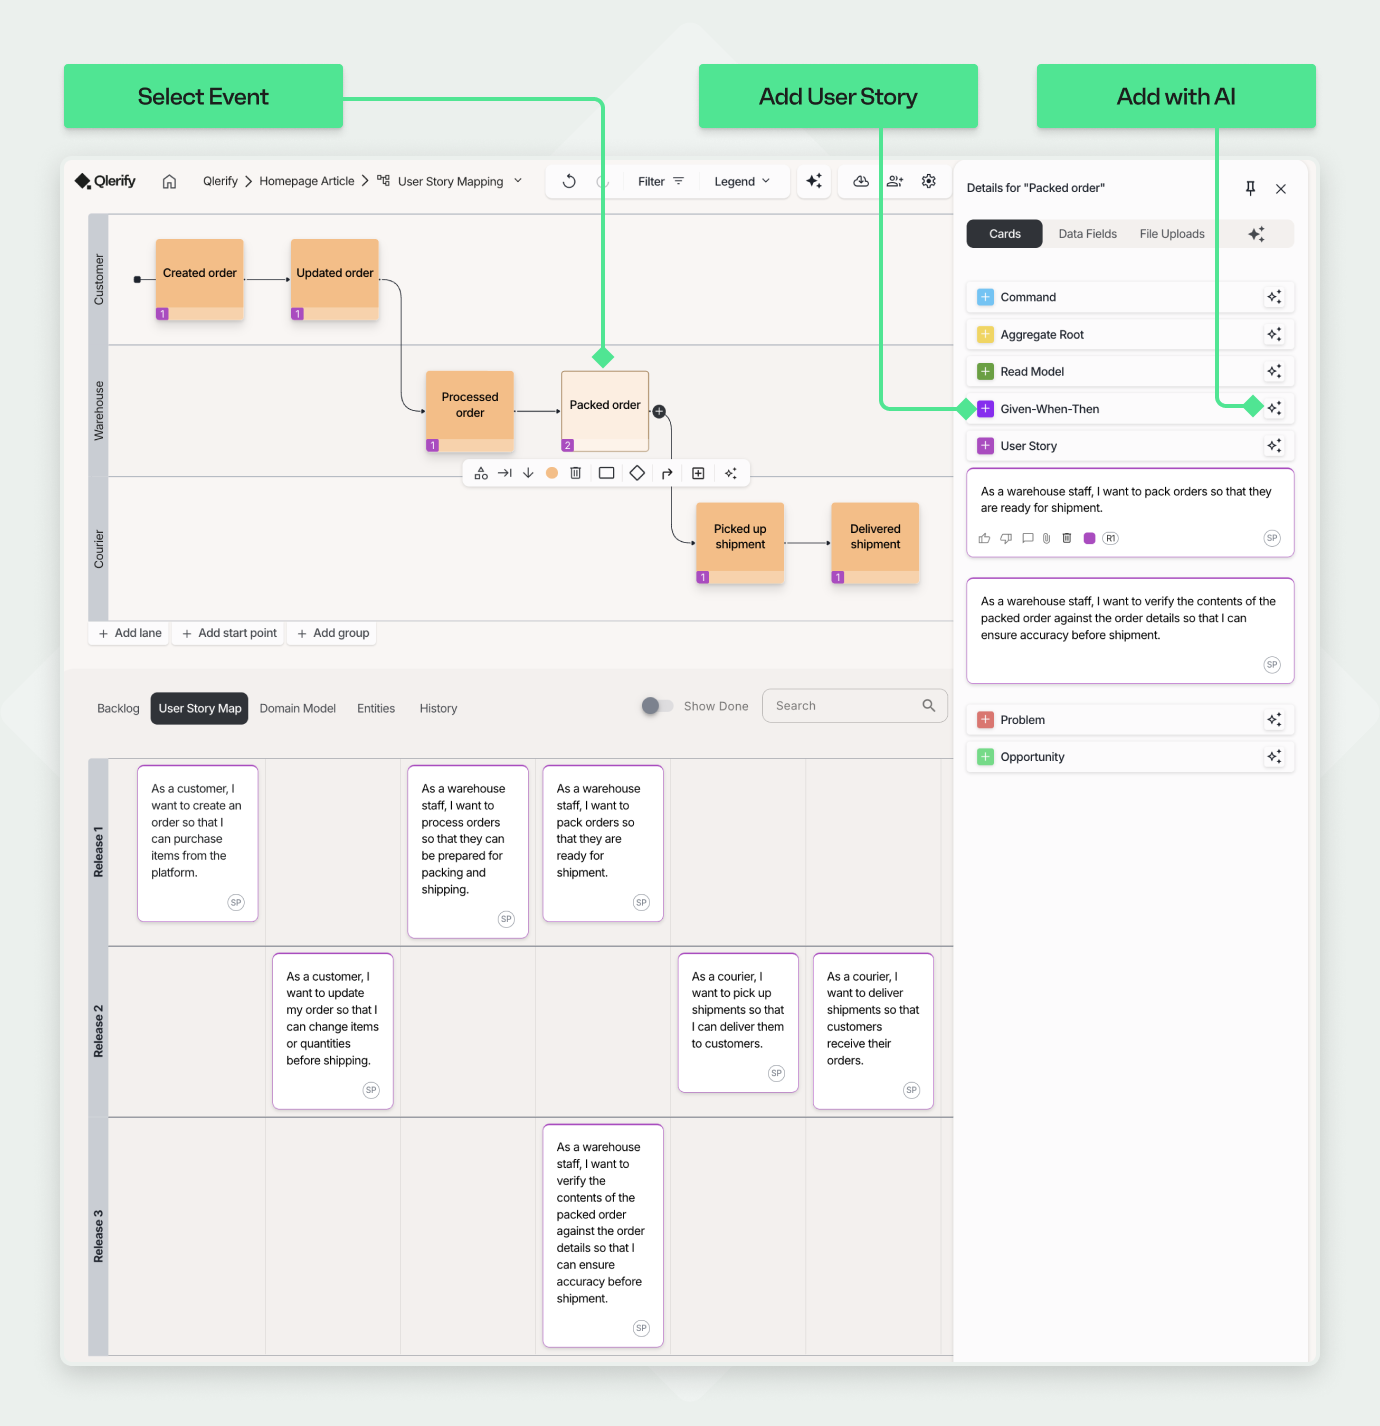
Once your User Story Map is generated, take a moment to review the Events—these are the high-level steps that form the backbone of the user journey.
Click on Events to select them and use drag and drop to rearrange them in a logical sequence. You can also:
A well-structured event flow is essential for getting the most out of any User Story Mapping Tool. It ensures the map reflects a realistic end-to-end experience from the user’s perspective.
Next, refine the User Stories under each Event. Click on an Event to view its associated stories in the sidebar—then work through them one at a time.
Make sure each User Story:
You can:
Some Events may have several User Stories, while others might only need one. The goal is to ensure your User Story Map captures meaningful, actionable slices of functionality.
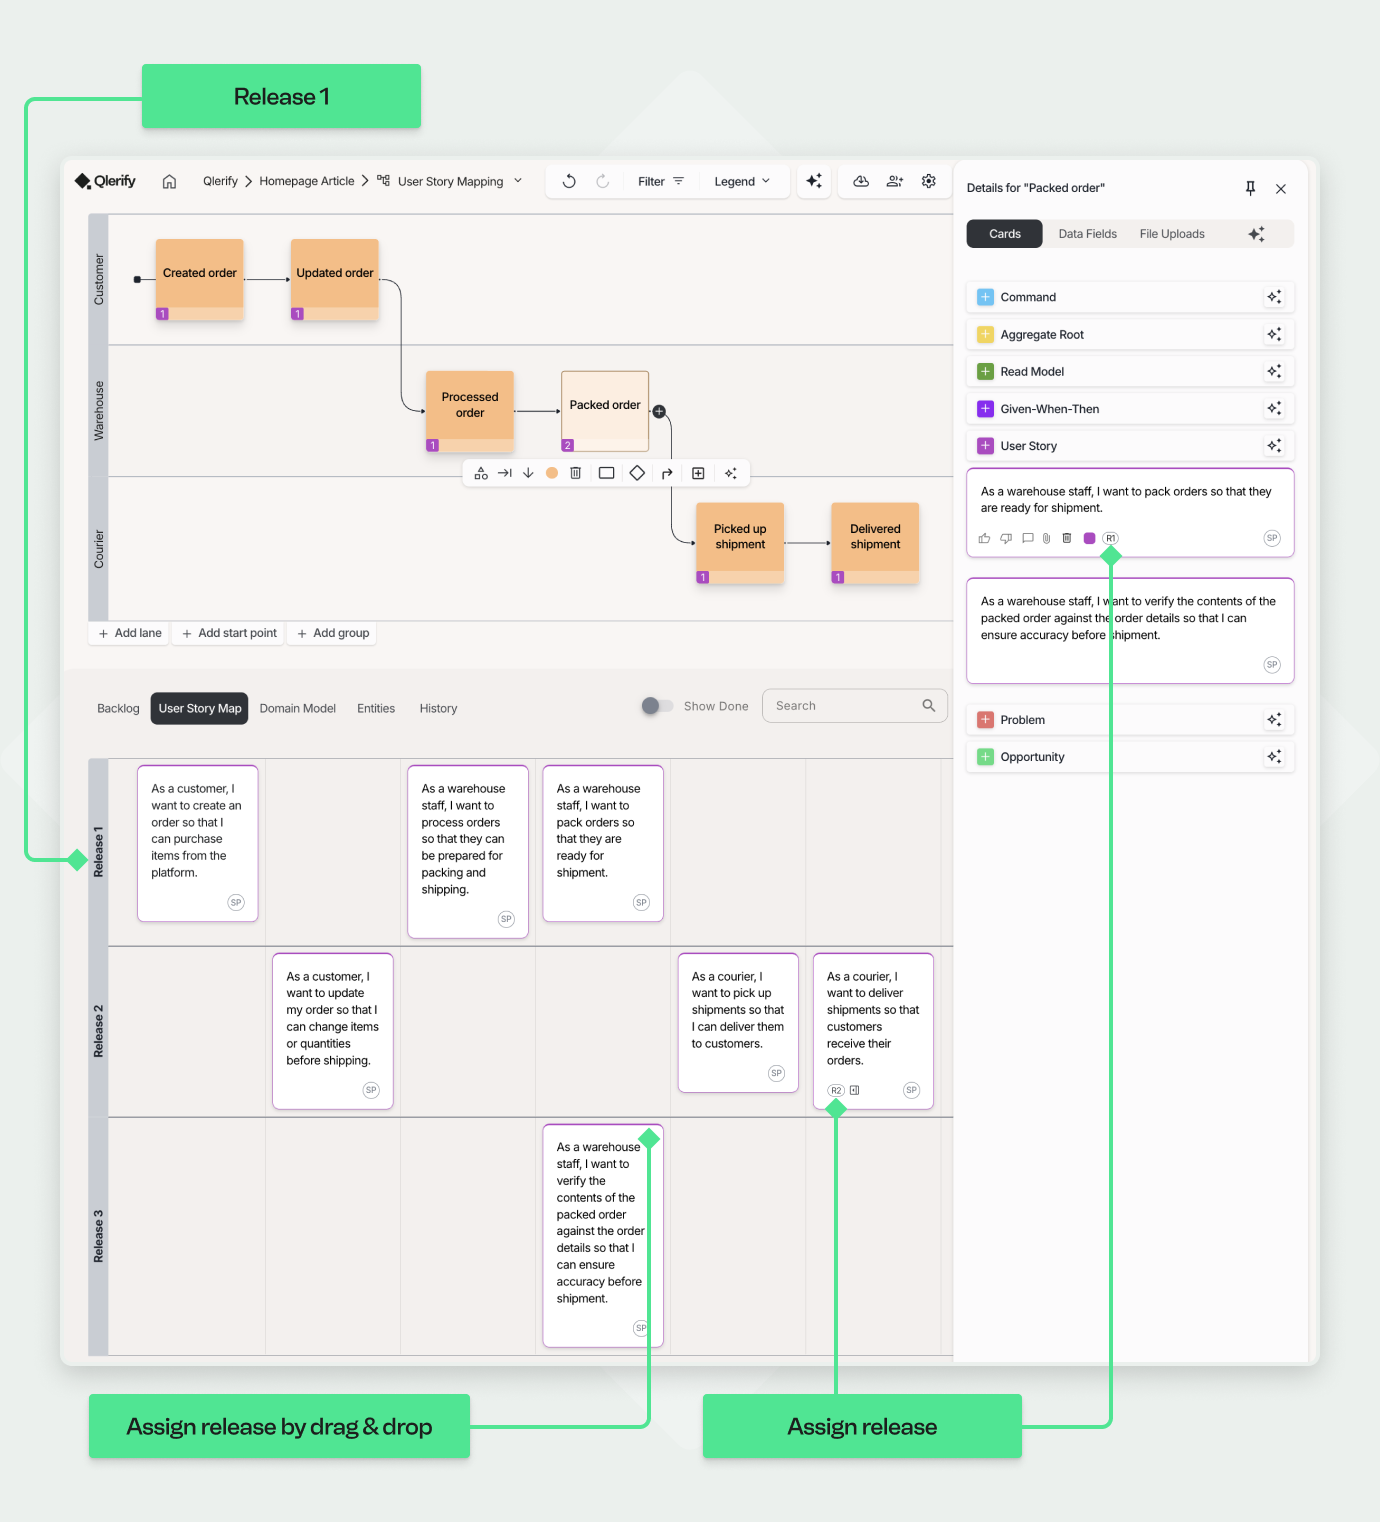
With your Events and User Stories in place, it’s time to prioritize. Group your stories into releases or iterations by assigning a release number to each one.
The top horizontal section—Release 1—should include the most critical User Stories that form your Minimum Viable Product (MVP). These are the essential steps required to deliver a functional product experience.
Lower sections represent future iterations, such as:
This release slicing helps your team focus on delivering value early, while maintaining a clear roadmap for future development.
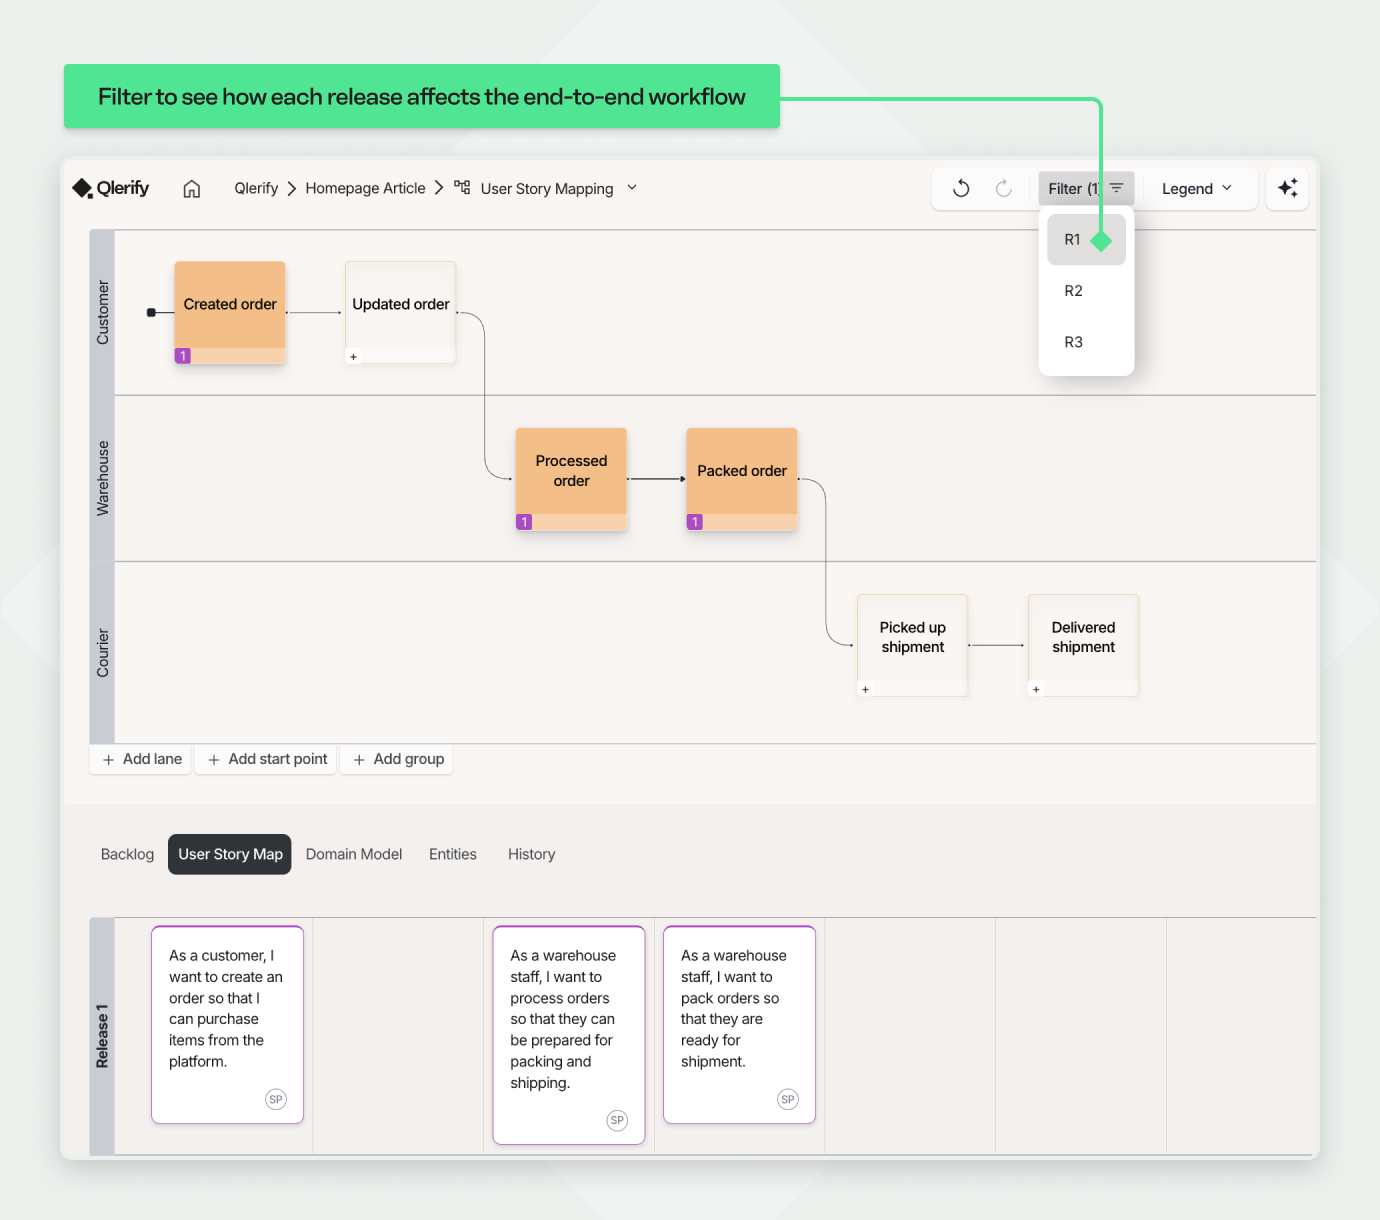
Use the release filter above the diagram to focus on one iteration at a time. This helps you validate whether each slice of the map forms a meaningful, end-to-end user experience.
Step back and review your User Story Map. Ask yourself:
Take this opportunity to fill in any gaps, add missing tasks, or adjust the structure.

Ready to turn your product ideas into a clear, actionable plan?
With Qlerify, you can generate a complete User Story Map in minutes using AI—or build it manually from scratch with your team. Our intuitive User Story Mapping Tool helps you:
Whether you're planning your next MVP or refining an existing backlog, Qlerify gives you the clarity and structure you need to move forward faster.
👉 Sign up for a free account today and see how easy it is to create your first User Story Map with the help of AI.


