Code generation with AI is a powerful way to accelerate development. Unlike other tools that rely solely on text prompts, Qlerify uses your Domain Model as a living blueprint for your application. This ensures you maintain complete control while producing high-quality, structured, and consistent code.
With Qlerify's new code generation engine, you're not just creating code once; you're entering a continuous development loop. Start with a solid architectural foundation, generate your code, and then, as your domain model evolves, intelligently update your application with AI assistance, all the way to a git commit.
Code generation with AI helps teams to:
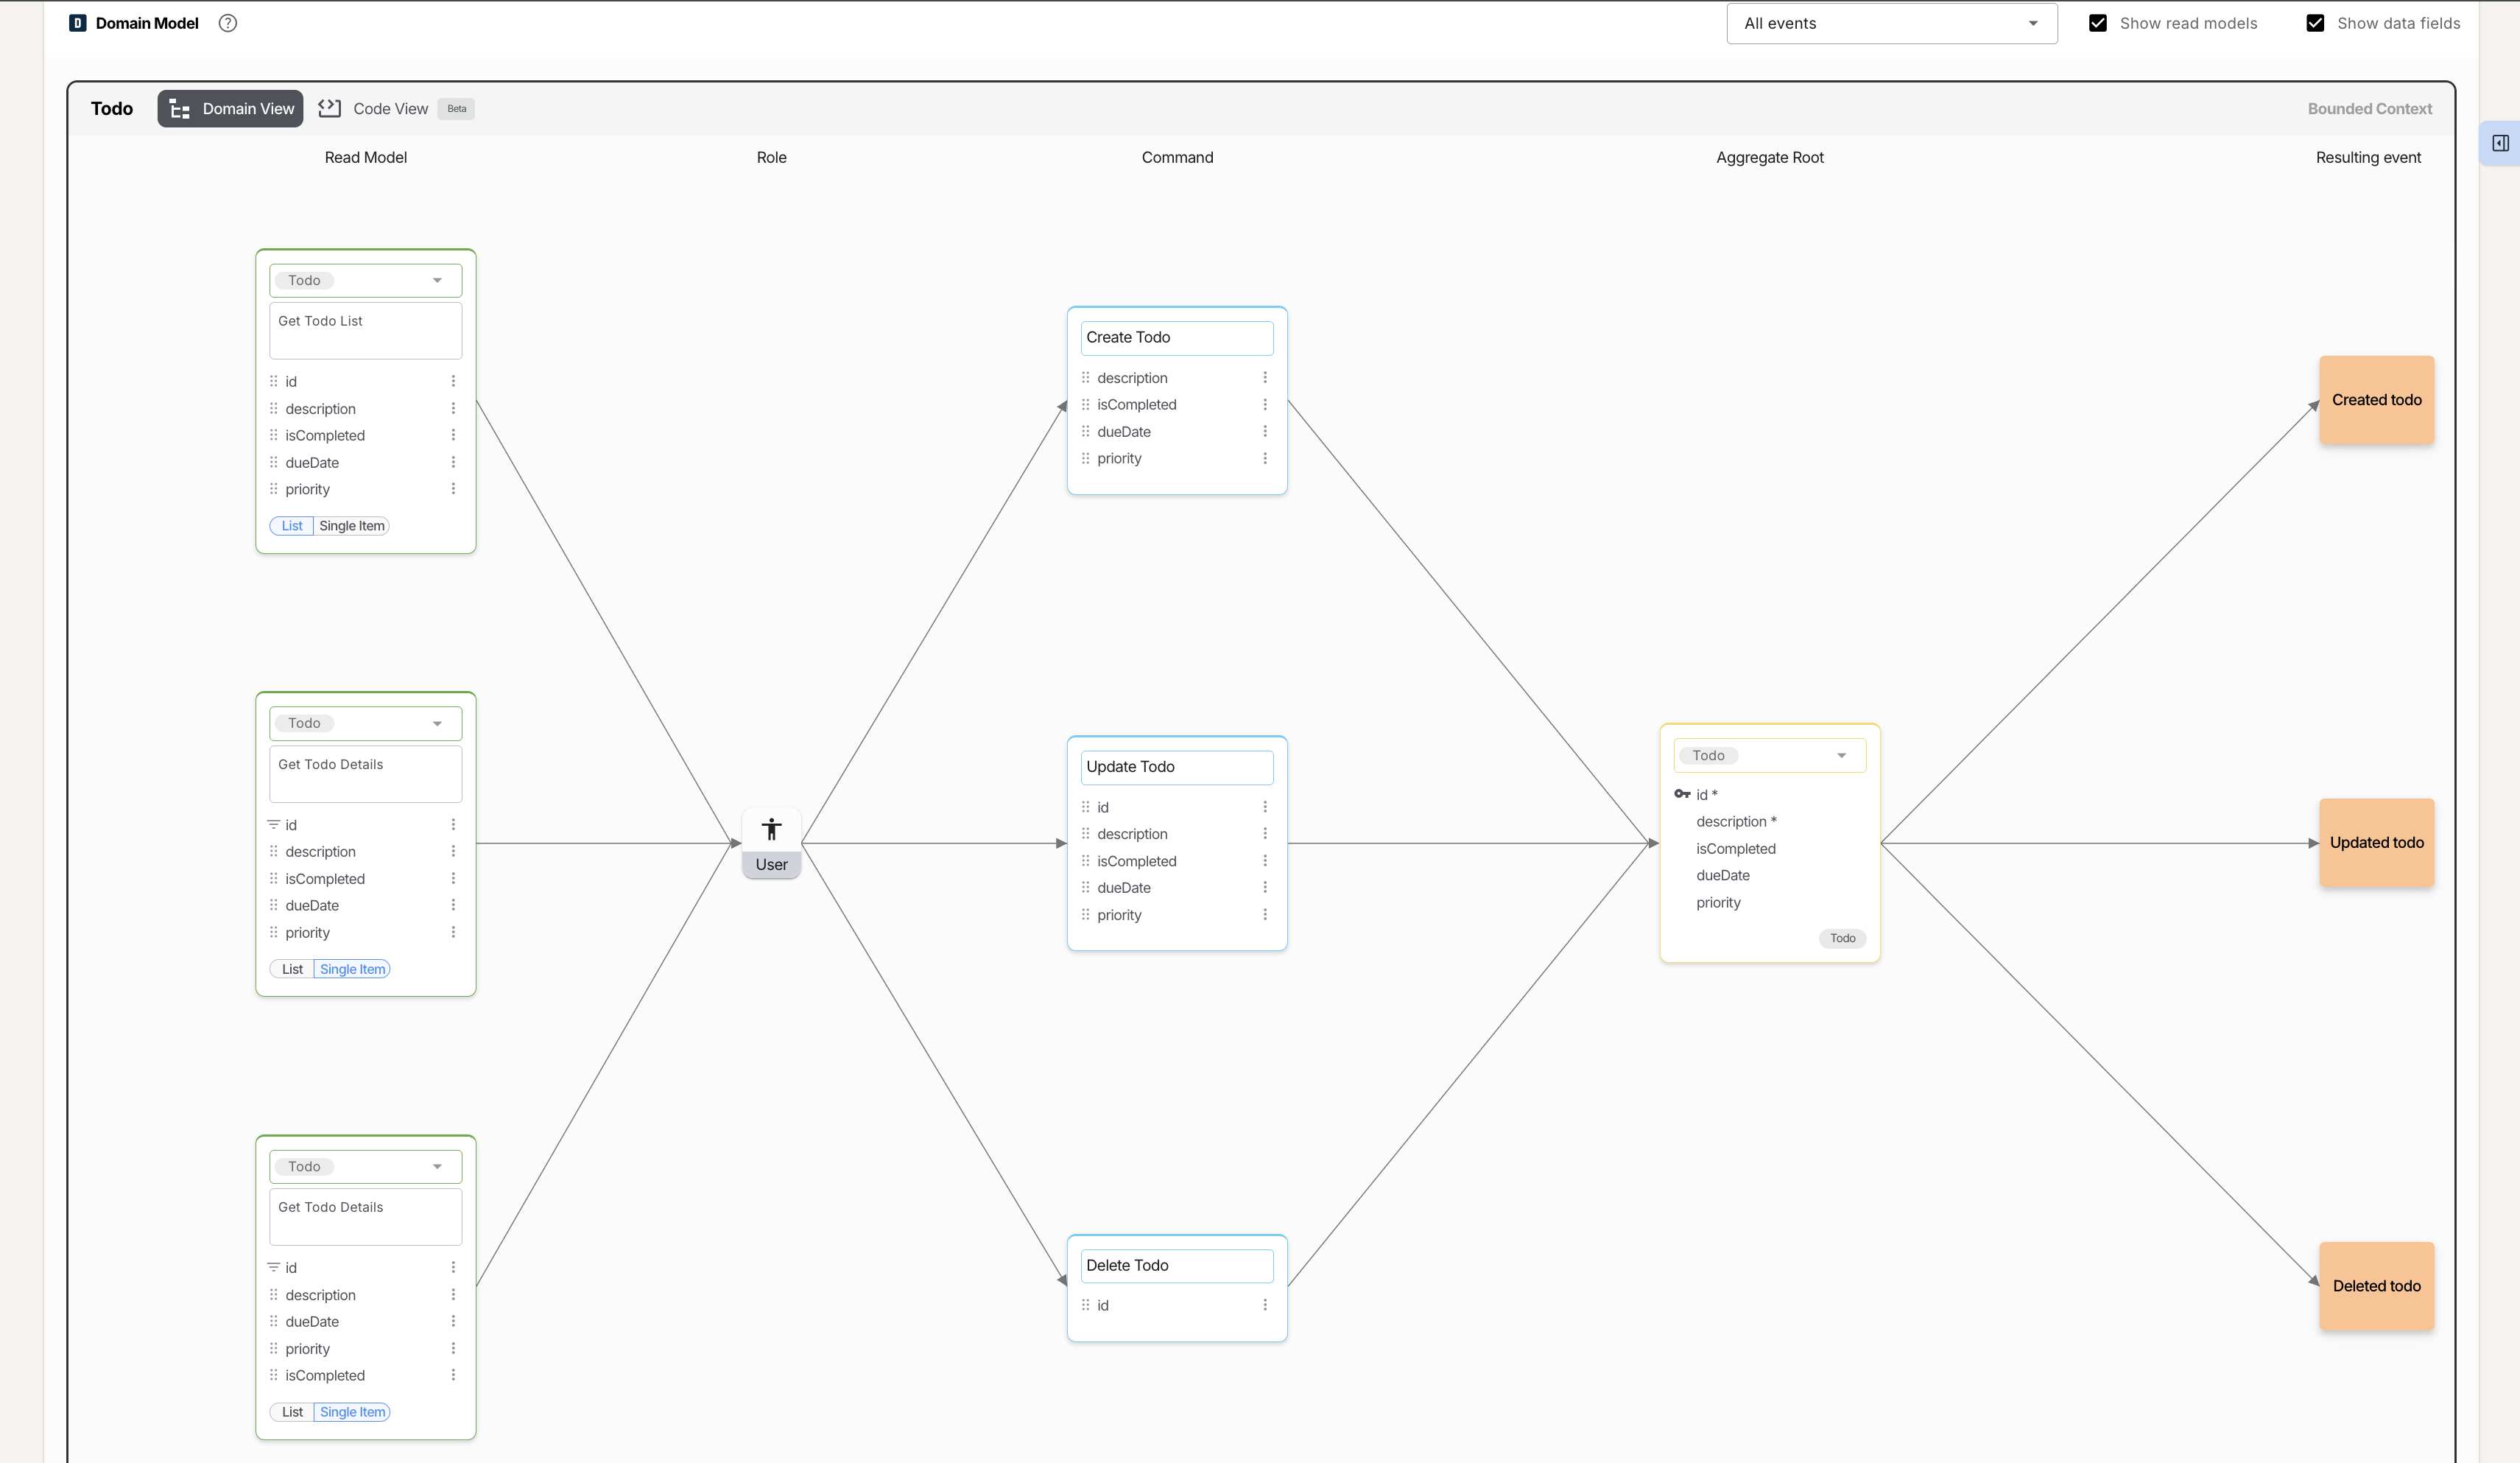
The new code generation is a guided, iterative process. Before you begin, ensure you have a Domain Model built using techniques like Event Storming or Event Modeling. This model is the source of truth for the AI.
After creating your Domain Model, open the Code View for the Bounded Context you wish to work on. Here, you'll find the main code generation interface.
On the left side of the Code View, you'll see a unique file tree that directly mirrors your Domain Model. Instead of a standard folder structure, your project is organized by domain concepts:
create-todo, update-todo)todo)get-all-todos)This view provides instant feedback on the state of your generated code:
This powerful view closes the loop between your design and the actual code, making it easy to see what needs attention, as well as making sure your documentation is always aligned with your codebase.
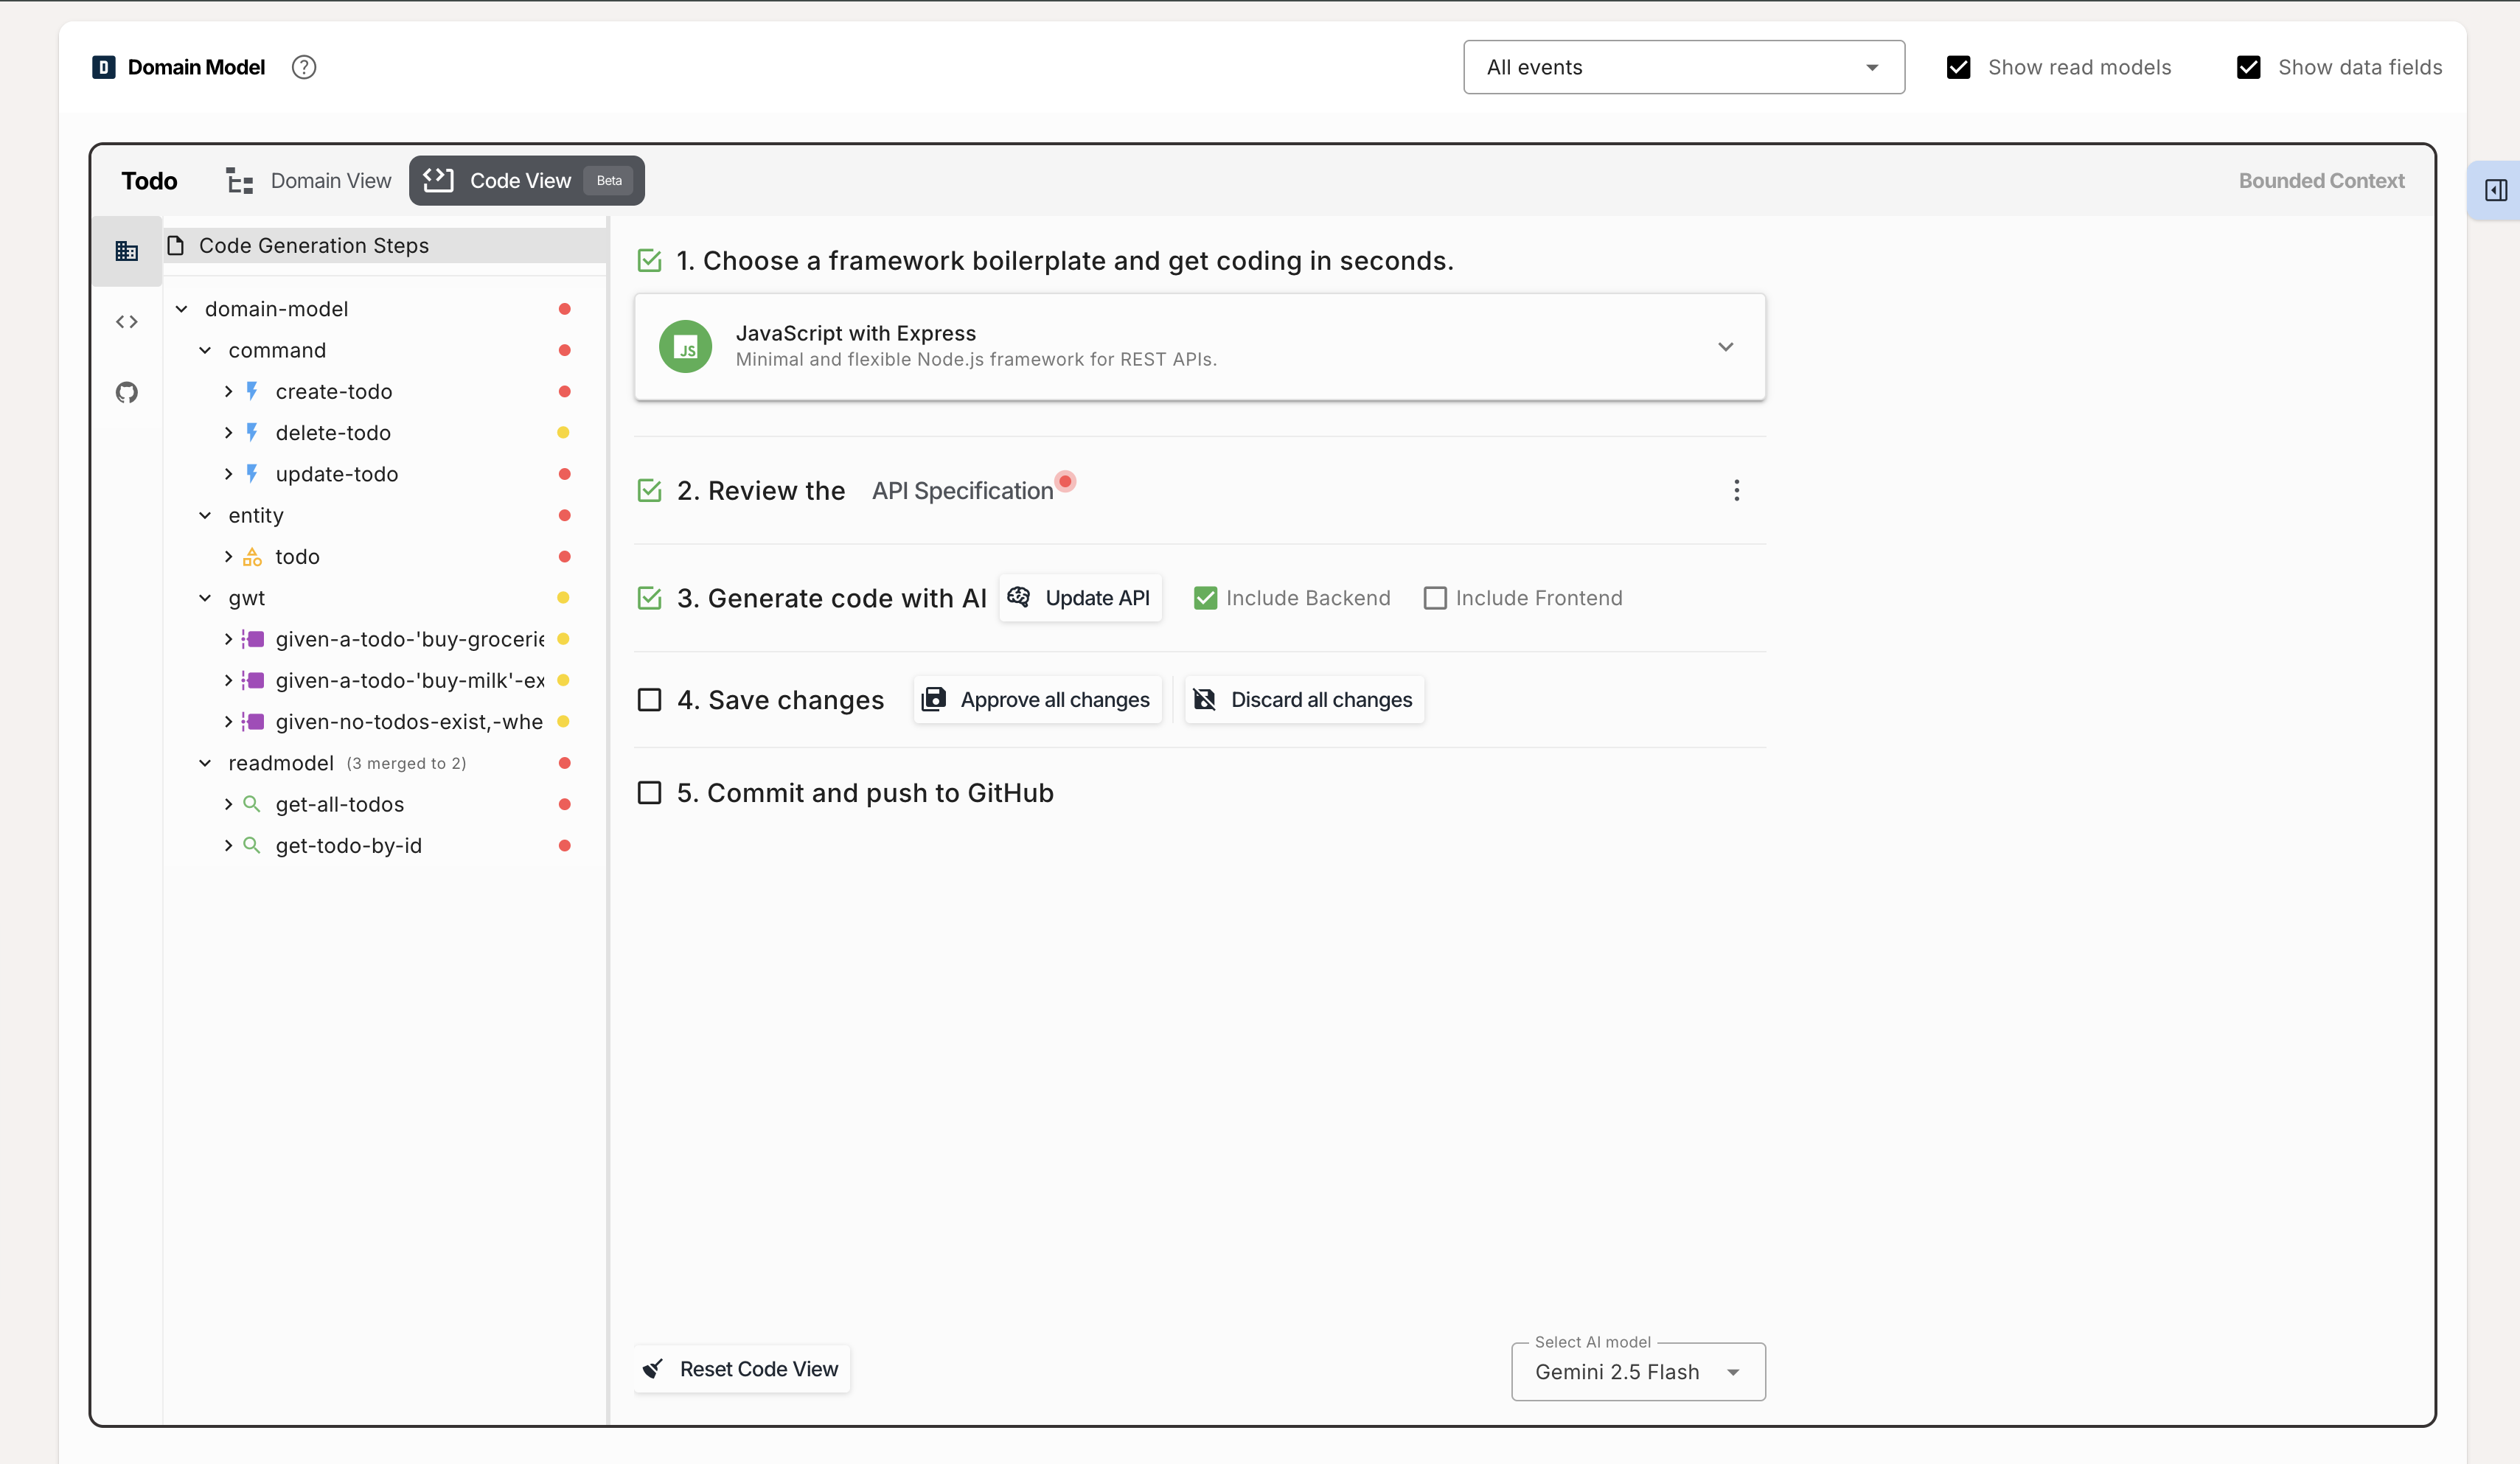
Every great application starts with a solid foundation. You begin by selecting a Starter Template from the "Code Generation Steps" panel. Think of this as a professional, full-stack framework boilerplate for your project.
In the near future, you will be able to choose from a variety of modern architectures, such as:
Selecting a template instantly populates your project with a well-organized file structure for a server, client, or both.
With your architecture in place, Qlerify automatically translates your Domain Model into a standard OpenAPI (Swagger) specification. This spec details all the endpoints, request/response models that will be generated.
Before the AI writes a single line of code, you can click to review this specification. This is a crucial validation step that ensures the AI will build exactly what you designed in your Domain Model.
This is where the magic happens. You have two ways to generate code:
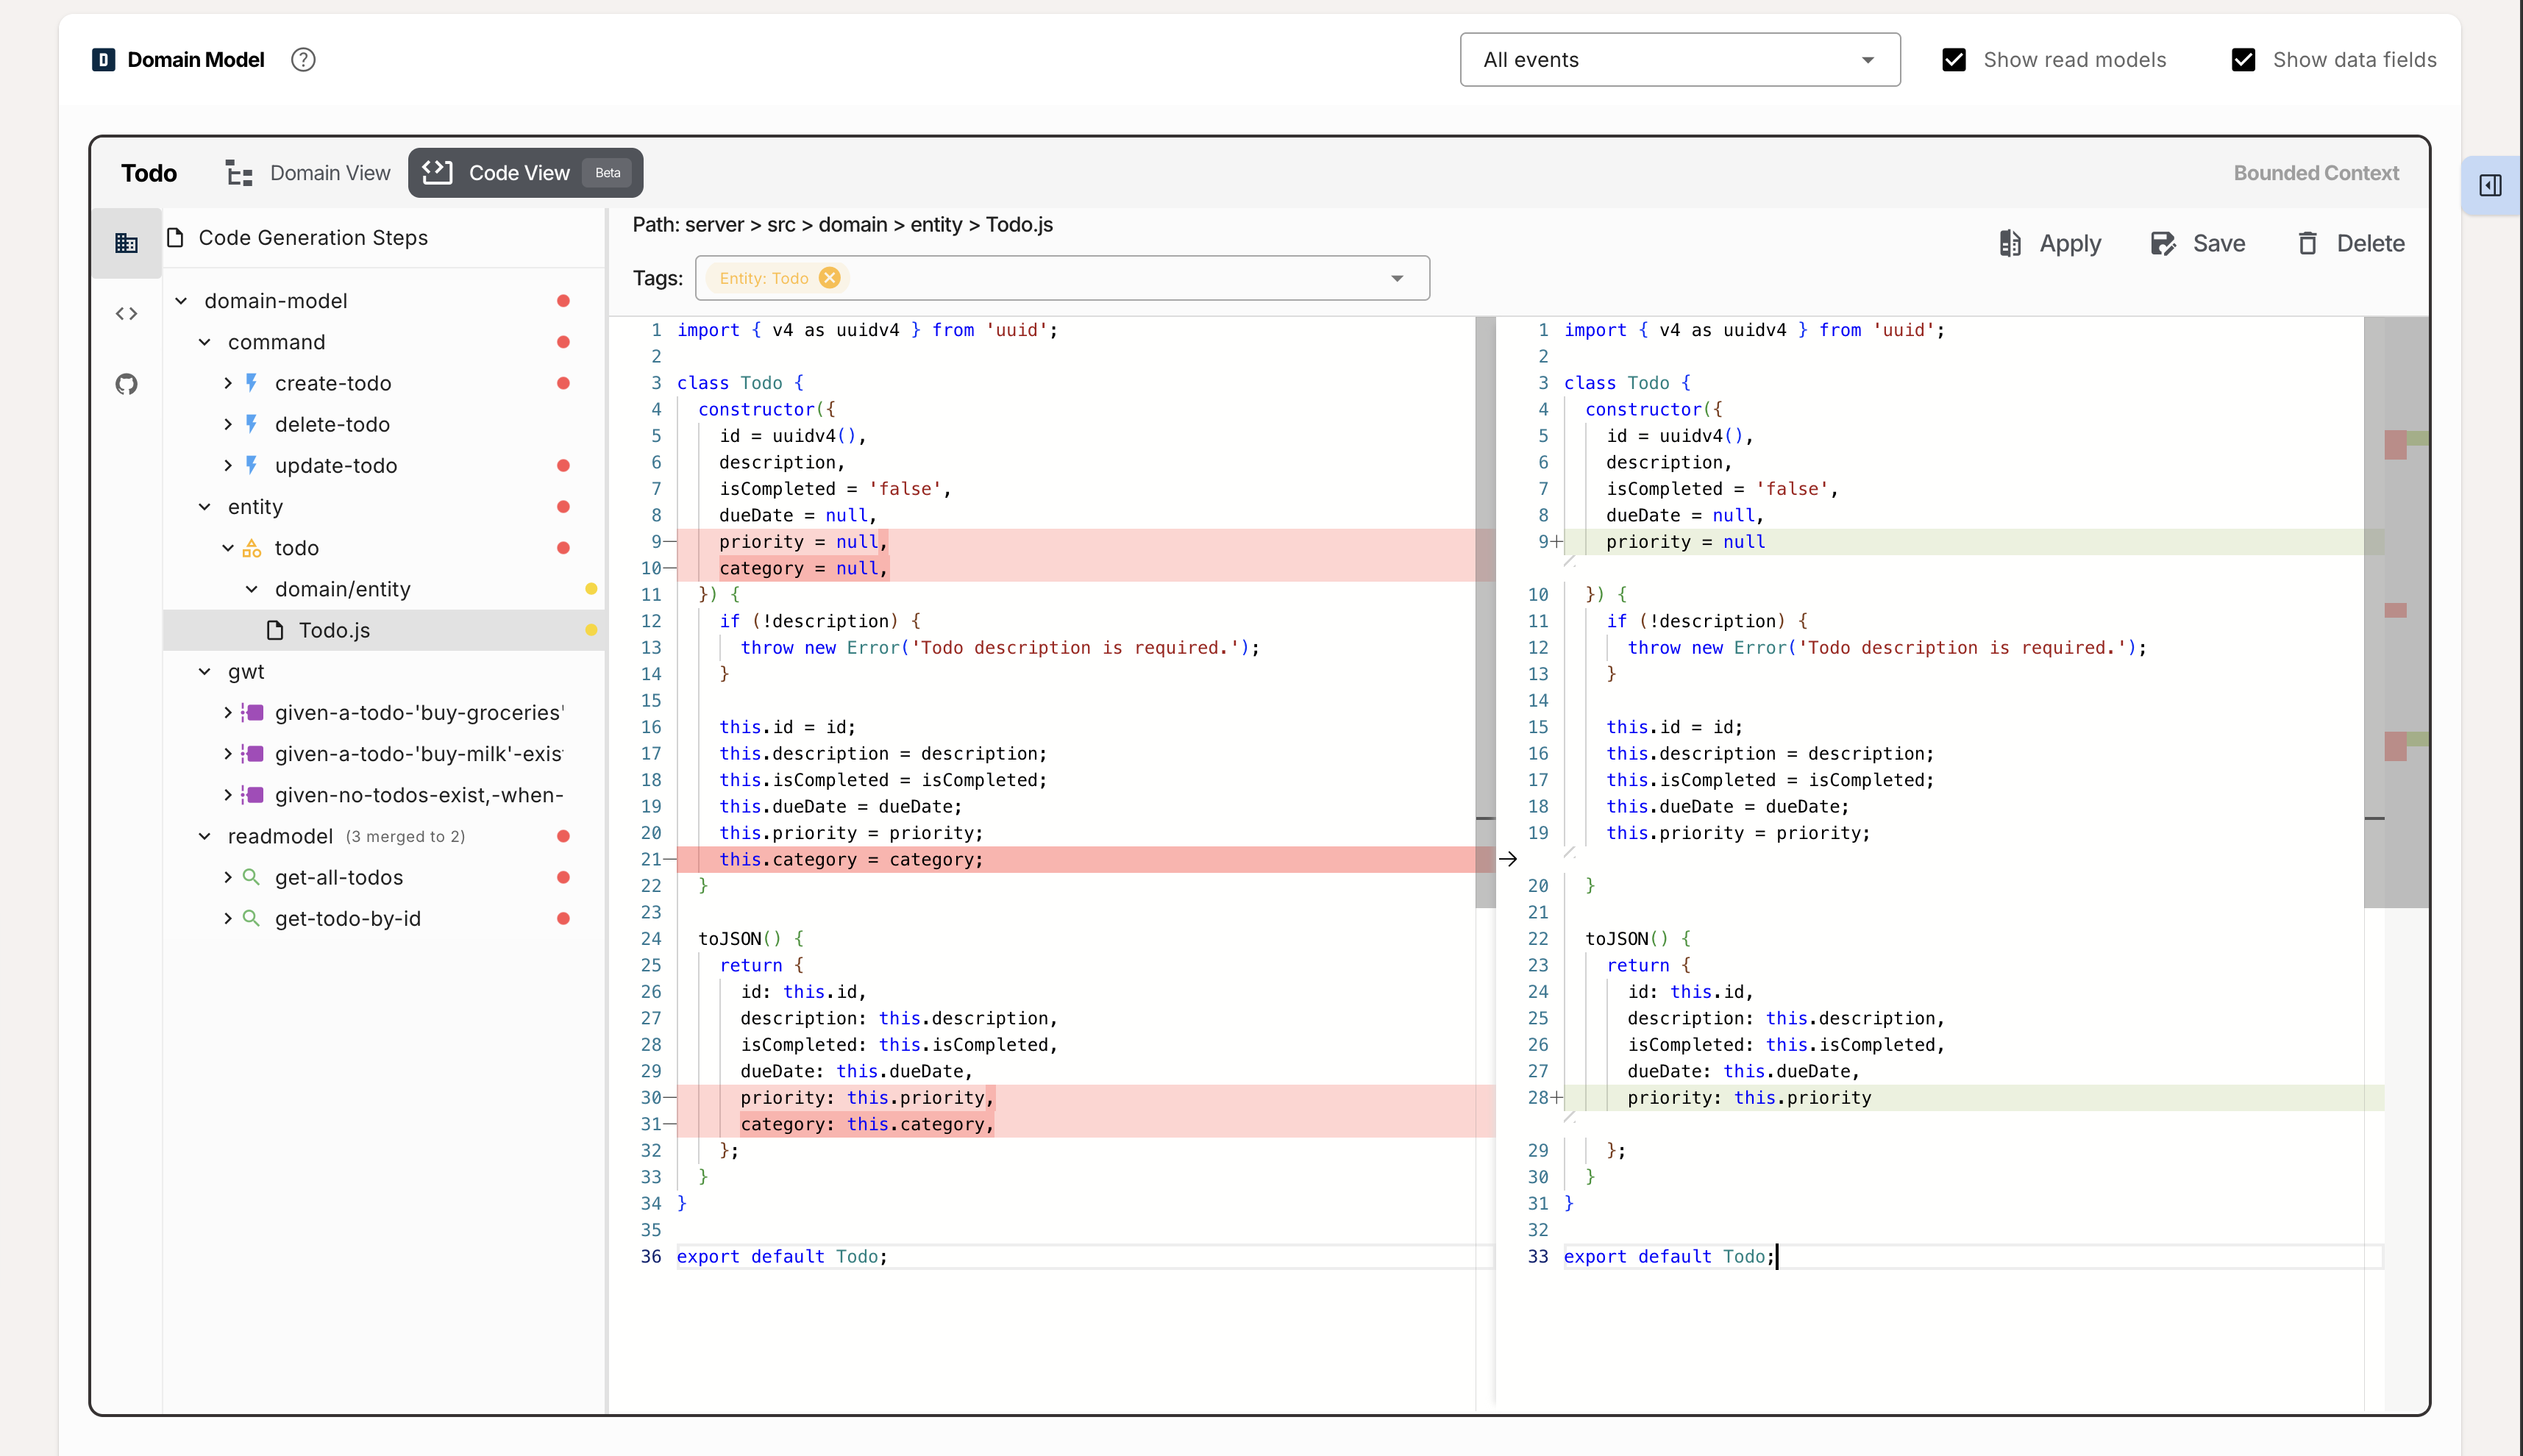
The Qlerify tool will only change the parts of your codebase that are directly affected by your domain changes, leaving the rest of your code untouched.
As you evolve your Domain Model, simply repeat the process. The system intelligently detects what has changed and surgically updates only the relevant parts of your codebase.
The AI's work is presented to you as a diff, similar to a Git pull request. You can clearly see the original code and the newly generated suggestions side-by-side. On the left, you have the current state of your code. On the right, you see the AI's proposed changes highlighted in green.
This gives you maximum control. Once you're satisfied, you can:
This workflow ensures you are always the final authority, using AI as a powerful assistant.
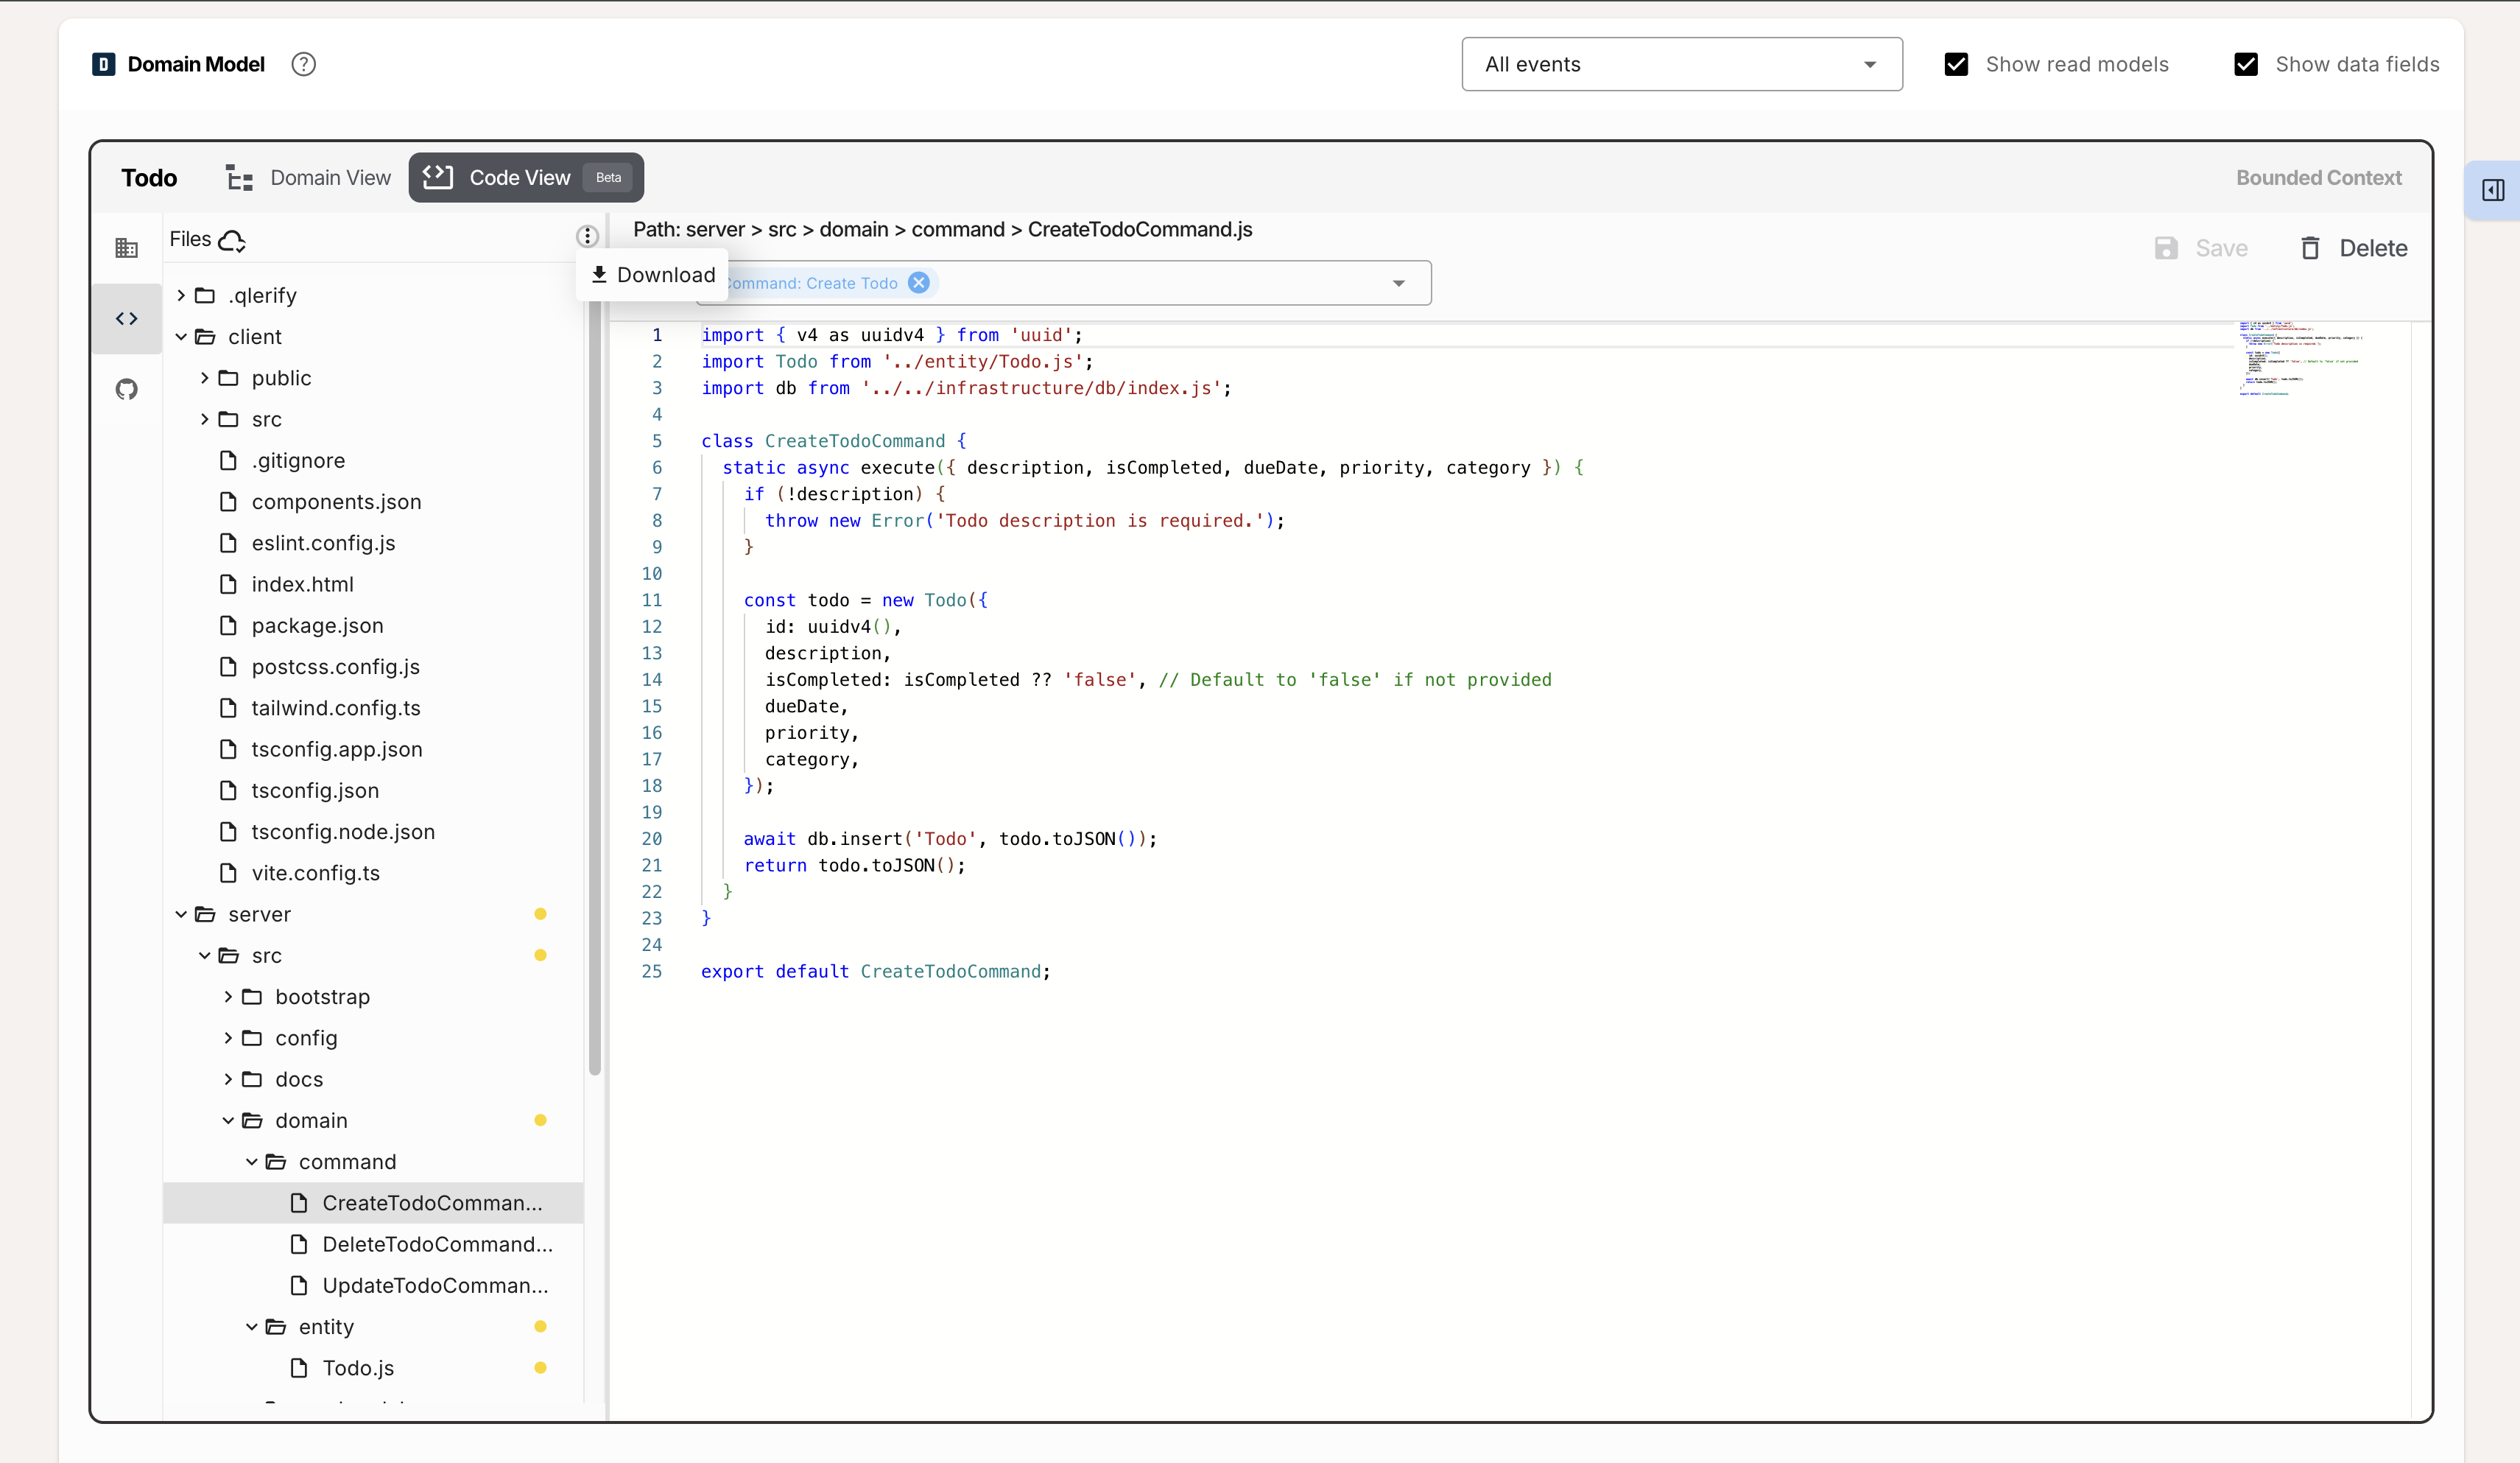
Now you have the option to either download your updated code as a ZIP file or commit it directly to your GitHub repository.
Navigate to the GitHub Tab where you can:

If you prefer not to use GitHub, you can always download the entire project as a ZIP file and manage it locally.
Beyond the main workflow, Qlerify provides additional tools to give you full control over your project.
Qlerify puts you in control by allowing you to choose the specific Large Language Model (LLM) used for code generation. You can experiment with different models to see which one best fits your needs. This option is available in the AI model selector, located at the bottom of the "Code Generation Steps" panel.
If you ever want to start over from a clean slate — perhaps to choose a different Starter Template or just to clear out an experiment — the **Reset Code View** button provides a safe way to do this. This action will:
Important: This action does not affect your code on GitHub; it only resets the project within the Qlerify interface.
From domain modeling to a live commit, your entire workflow is now unified in one place.

By generating code with a Domain Model as a base, the team can maintain control over the design and architecture of the solution. The generated code can be based on existing Entities or Data Models.
If you haven't tried code generation in Qlerify yet, now is the perfect time to explore its capabilities and boost your development workflow! To sign up for a Qlerify account, click on the link in the footer.


